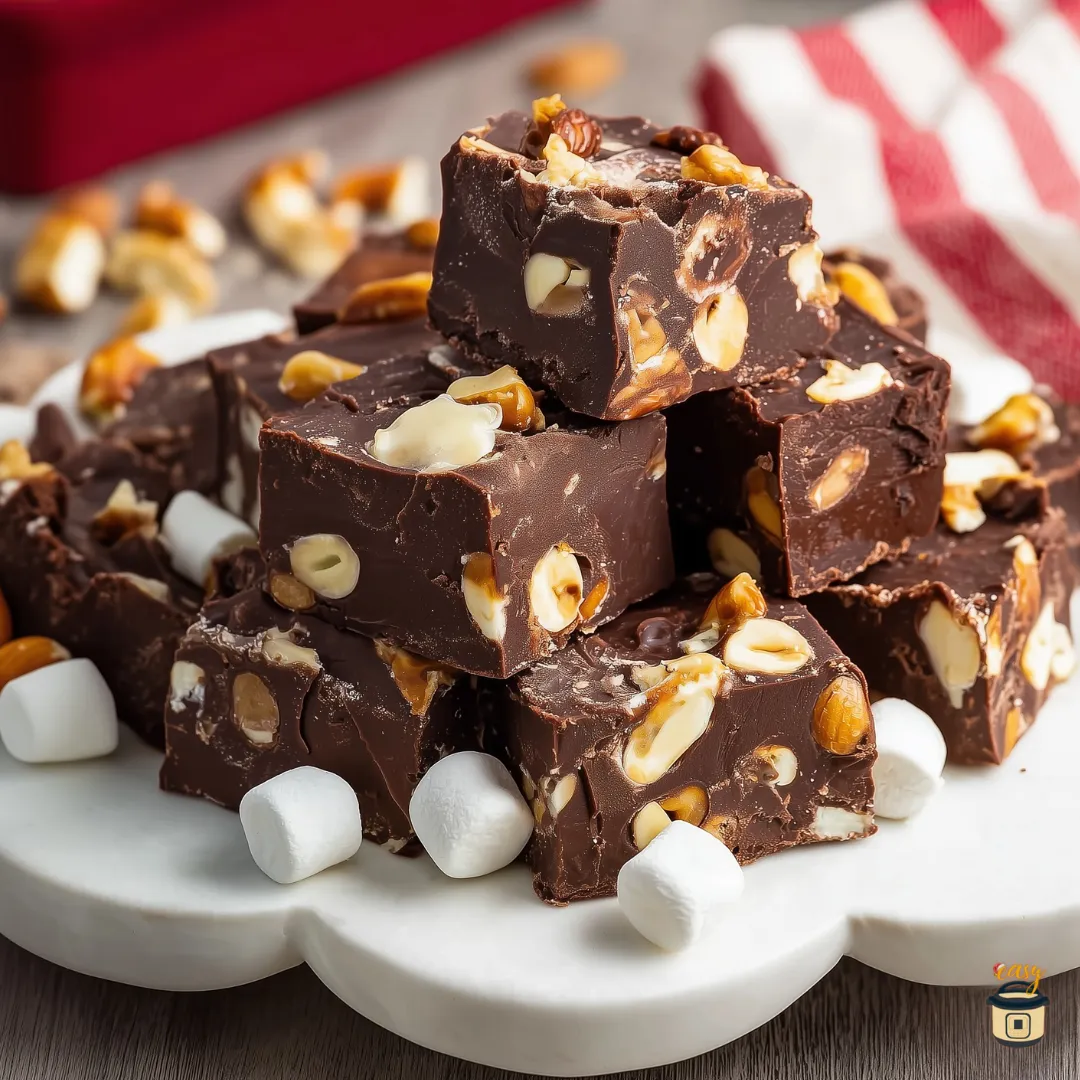
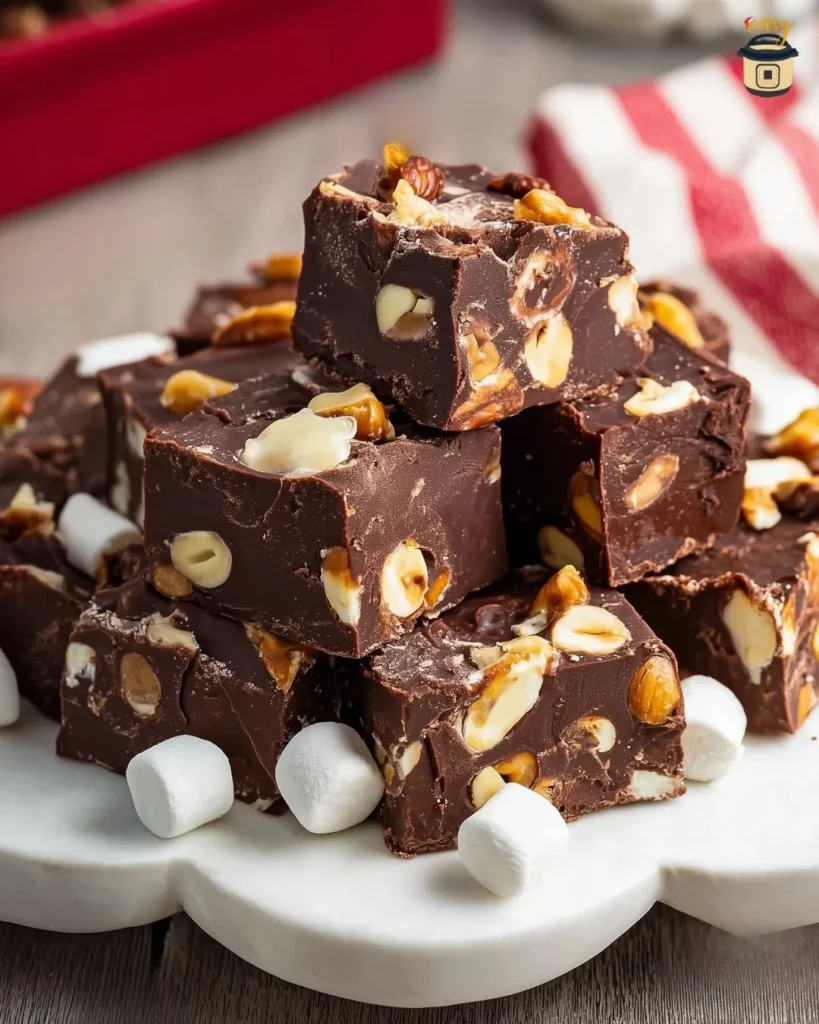
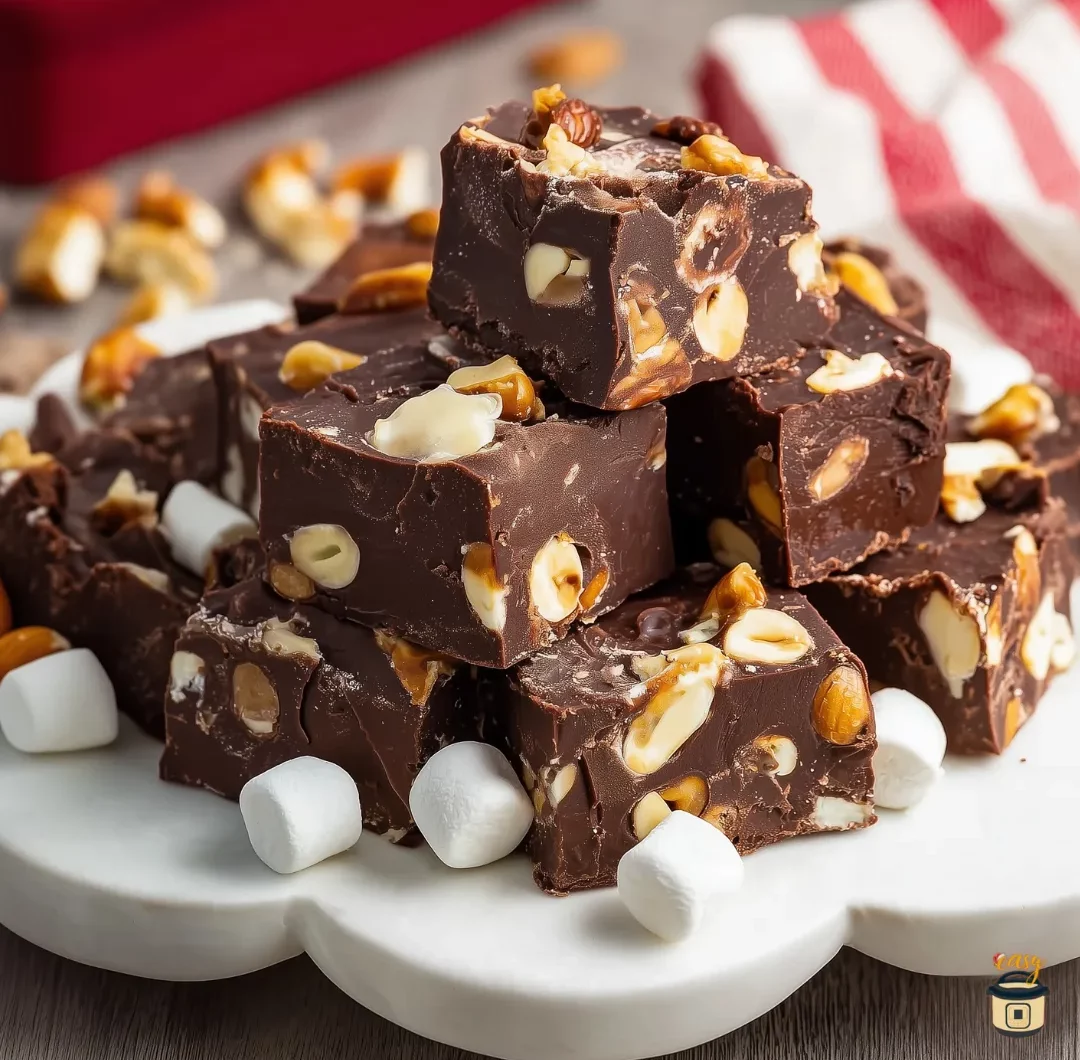
Looking for a crowd-pleasing chocolate dessert that comes together in minutes? This rocky road fudge recipe delivers rich, ultra-chocolatey squares loaded with gooey marshmallows and crunchy nuts—no candy thermometer required. Whether you’re preparing treats for the holidays, a bake sale, or edible gifts, this foolproof fudge is about to become your go-to recipe.
Why You’ll Love This Rocky Road Fudge
This easy rocky road fudge hits all the right notes. The chocolate base is silky and rich, while mini marshmallows add pockets of sweetness, and nuts provide a satisfying crunch. Best of all, it takes just 10 minutes of active prep time and uses simple pantry ingredients you probably already have on hand.
Perfect for holiday cookie trays, potluck desserts, or last-minute gifts, this no-fail rocky road fudge requires zero special equipment and delivers professional-looking results every single time. You can make it on the stovetop or in the microwave, and it sets beautifully in the refrigerator with minimal effort. Kids love helping stir in the marshmallows and nuts, making this a fun family baking project during the holidays or any time you need a quick chocolate fix.
What Is Rocky Road Fudge?
Rocky road fudge combines a smooth chocolate base with mini marshmallows and chopped nuts to create a confection that’s part candy, part dessert. Unlike classic fudge that relies on precise temperature control and beating, this version uses sweetened condensed milk as a shortcut for a creamy, stable texture that sets without fuss.
The name “rocky road” comes from the bumpy, uneven appearance created by the marshmallows and nuts studded throughout the chocolate. While rocky road ice cream features the same flavor trio, rocky road chocolate fudge offers a firmer, sliceable treat that’s ideal for gifting and serving at parties. Traditional recipes call for walnuts or pecans, but you can easily swap in almonds, cashews, or peanuts depending on your preference.
Ingredients You’ll Need
This rocky road fudge recipe relies on just five core ingredients, all of which are pantry staples or easy grocery store finds. The beauty of this recipe is its simplicity—no obscure items or specialty chocolate required.
Core Fudge Base
The foundation starts with 2 cups of semi-sweet chocolate chips, which melt smoothly and provide balanced sweetness. You can substitute milk chocolate chips for a sweeter result or dark chocolate for a more intense cocoa flavor. Chocolate bars work just as well as chips; simply chop them into small, uniform pieces for even melting.
Next, you’ll need 1 can (14 ounces) of sweetened condensed milk. This thick, sweet milk product is the secret to no-fail fudge—it eliminates the need for candy thermometers and complicated temperature stages. Make sure you’re using sweetened condensed milk, not evaporated milk, as they’re not interchangeable in fudge recipes.
Finally, add ½ teaspoon vanilla extract to round out the chocolate flavor. Pure vanilla works best, but imitation vanilla is perfectly fine if that’s what you have.
Rocky Road Mix-Ins
The signature rocky road texture comes from 2½ cups mini marshmallows. Mini marshmallows distribute more evenly than large ones and create those characteristic pockets of sweetness throughout each square. While you can chop regular marshmallows in a pinch, minis are strongly recommended for the best results.
For the nutty crunch, you’ll need 1 cup chopped nuts. Peanuts, pecans, almonds, and walnuts all work beautifully in this recipe. Toast them lightly before adding for deeper flavor, or use them raw for simplicity. If you’re making this for a crowd, consider any nut allergies and be prepared to make a nut-free version by substituting extra marshmallows or crushed cookies.
Optional Flavor Twists
While the classic version is delicious as-is, feel free to experiment with rocky road fudge variations. A sprinkle of flaky sea salt on top before chilling adds sophisticated contrast. Swirl in ¼ cup of peanut butter for a peanut butter rocky road fudge twist, or fold in ½ cup of shredded coconut for tropical flair. Some bakers add halved maraschino cherries for a cherry-chocolate version, or crushed graham crackers for extra texture.
Equipment and Prep Tips
Successful fudge starts with proper preparation. You’ll need either an 8×8-inch or 9×13-inch pan—the smaller pan yields thicker, taller squares, while the larger pan creates thinner pieces that set faster. Both sizes work perfectly; just adjust your expectations for thickness and number of servings.
Line your pan with aluminum foil or parchment paper, leaving a few inches of overhang on two opposite sides. This creates handles that make lifting the entire fudge slab out of the pan effortless, ensuring clean cuts and easy storage. Lightly spray or brush the liner with cooking spray or butter to prevent any sticking, though this step is optional if you’re using non-stick foil.
You’ll also need a microwave-safe mixing bowl (or a medium saucepan if using the stovetop method), a rubber spatula for folding, and a sharp knife for cutting the finished fudge into squares. Having everything ready before you start melting chocolate keeps the process smooth and stress-free.
Step-by-Step Instructions (Stovetop Method)
Making stovetop rocky road fudge is straightforward when you follow these steps carefully. Start by lining your chosen pan with foil or parchment and setting it aside where you can reach it easily.
Place your 2 cups of chocolate chips, the full can of sweetened condensed milk, and a small pat of butter (optional, for extra richness) in a medium saucepan. Set the heat to low and stir constantly with a rubber spatula. The key is patience—low heat prevents scorching and creates a smooth, glossy mixture. Within 5-7 minutes, the chocolate will fully melt into the condensed milk, creating a thick, shiny sauce.
Once the mixture is completely smooth with no visible chocolate chunks, remove the pan from heat immediately. Stir in the ½ teaspoon vanilla extract, mixing thoroughly. Let the chocolate mixture cool for 2-3 minutes—this prevents the marshmallows from melting when you add them.
Now fold in your 2½ cups mini marshmallows and 1 cup chopped nuts using a gentle folding motion. You want to distribute them evenly without deflating the volume. Some marshmallows will start to soften slightly from the residual heat, which is perfectly normal and creates that signature gooey texture.
Scrape the entire mixture into your prepared pan, using your spatula to spread it into an even layer and press it gently into the corners. Don’t press too hard—you want to maintain the volume and texture. Place the pan in the refrigerator and chill for at least 2-4 hours, or until completely firm to the touch.
Visual Cues So You Don’t Overcook
When melting chocolate for fudge, watch for a smooth, glossy appearance. The mixture should flow off your spatula in a thick ribbon and look completely homogeneous. If you see any grainy texture or the chocolate appears separated with oil pooling on top, you’ve overheated it. Avoid grainy fudge by keeping the heat low and stirring constantly—never let the mixture come to a boil, as this breaks the emulsion and ruins the silky texture.
Chilling and Cutting for Clean Squares
After the recommended chill time, your fudge should feel firm when you press it lightly with your finger. Use the foil overhang to lift the entire slab out of the pan and transfer it to a cutting board. For the cleanest cuts, run a large, sharp knife under hot water, wipe it dry, then slice. Repeat this warming process between each cut for professional-looking rocky road fudge squares. Smaller pieces (about 1-inch squares) are ideal for serving platters and gift boxes, while larger 2-inch squares make satisfying individual treats.
Microwave Method (Super Quick Option)
If you prefer speed and minimal cleanup, the microwave rocky road fudge method delivers identical results in even less time. Combine your 2 cups chocolate chips and the full can of sweetened condensed milk in a large microwave-safe bowl. Microwave on high power for 1 minute, then remove and stir thoroughly. Return to the microwave and heat in 30-second intervals, stirring well after each burst, until the chocolate is completely melted and smooth—usually 2-3 intervals total.
The key to quick microwave fudge success is stirring between intervals. This distributes heat evenly and prevents hot spots that can scorch the chocolate. Once smooth, stir in vanilla, let cool briefly, then fold in marshmallows and nuts exactly as you would in the stovetop version. Pour into your prepared pan and chill as directed.
Rocky Road Fudge Flavor Variations
The beauty of this recipe is how easily you can customize it to suit any occasion or taste preference. These rocky road fudge variations keep the basic method the same while changing up flavors and mix-ins.
Nut and Mix-In Swaps
Create nutty rocky road fudge with your favorite combination—try half pecans and half walnuts, or go tropical with macadamia nuts and cashews. For a fun twist, replace half the nuts with crushed graham crackers or vanilla wafer cookies for rocky road fudge with biscuits. Dried cherries or cranberries make festive additions for cherry rocky road fudge, adding chewy tartness that balances the sweet chocolate.
Peanut Butter and White Chocolate Versions
For peanut butter rocky road fudge, reduce the chocolate chips to 1½ cups and add ½ cup peanut butter chips to the melting mixture. Or swirl ¼ cup warmed peanut butter into the chocolate base before adding marshmallows for a marbled effect. White chocolate rocky road fudge swaps semi-sweet chips for white chocolate chips—use the same measurements and method, but note that white chocolate melts faster, so reduce your microwave time slightly.
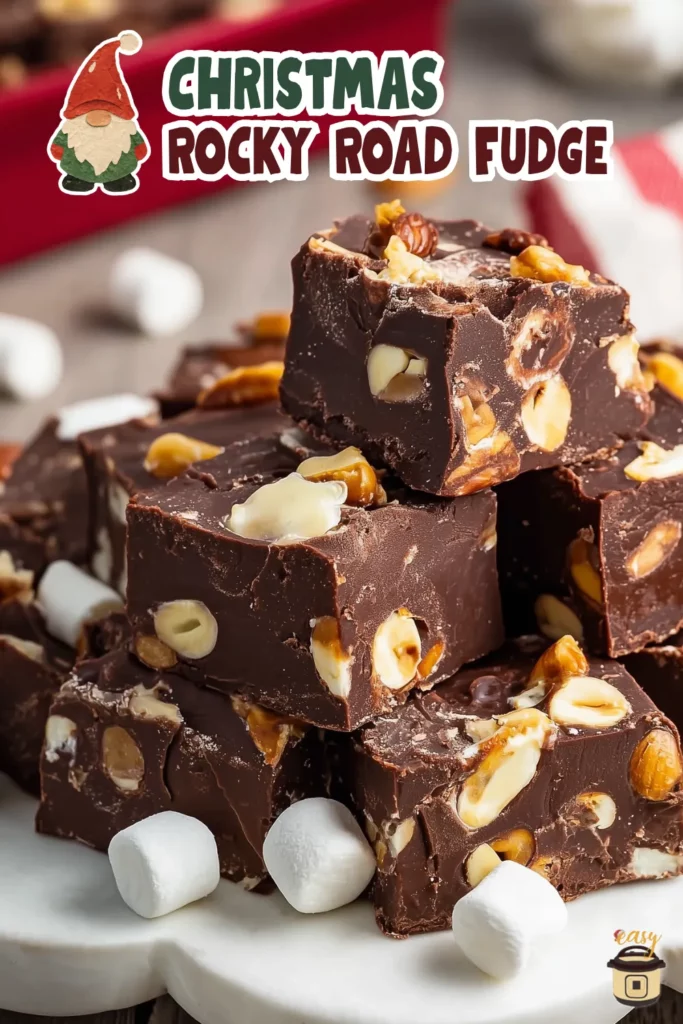
Holiday and Themed Fudge Ideas
Transform this into Christmas rocky road fudge by adding red and green M&Ms or crushed candy canes to the mix-ins. Top with festive sprinkles before chilling for holiday rocky road fudge that looks bakery-quality. For birthday parties, use colorful mini marshmallows and add sprinkles that match your party theme. Halloween versions work beautifully with orange chocolate chips and candy corn mixed in—get creative with seasonal ingredients to make this party rocky road fudge fit any celebration.
Tips for Perfect Rocky Road Fudge Every Time
Follow these rocky road fudge tips to guarantee success with every batch. First, use low, gentle heat whether you’re working on the stovetop or in the microwave. High heat causes chocolate to seize and become grainy. Second, melt the chocolate completely before proceeding—any unmelted chips will create lumps in your finished fudge. Third, let the melted chocolate cool for a few minutes before adding marshmallows to prevent them from melting entirely into the mixture.
Measure your ingredients accurately, especially the condensed milk. Using too little results in fudge that won’t set properly, while too much makes it overly soft. Finally, be patient with chilling—no-fail rocky road fudge needs adequate time in the refrigerator to firm up completely. Rushing this step results in fudge that’s too soft to cut cleanly.
Common Mistakes to Avoid
Why is my fudge grainy? Overheating chocolate or boiling the mixture causes the fat to separate, creating an unpleasant grainy texture. Always use low heat and remove from heat as soon as everything melts. If your fudge won’t set, you may have added too much condensed milk or not chilled it long enough—return it to the refrigerator for several more hours. Overly hard or crumbly texture usually means the chocolate was overcooked; next time, watch carefully and remove from heat promptly when smooth.
Storage, Freezing, and Make-Ahead
Store your finished rocky road fudge in an airtight container at room temperature for up to one week, or refrigerate for up to two weeks. The refrigerator keeps it extra firm, which some people prefer, while room temperature storage yields a slightly softer, creamier texture. Layer pieces between sheets of waxed paper or parchment to prevent sticking.
Can you freeze rocky road fudge? Absolutely. Wrap individual pieces or entire batches tightly in plastic wrap, then place in a freezer-safe container or zip-top bag. Frozen fudge keeps for up to three months. When ready to serve, thaw in the refrigerator overnight for best texture—avoid thawing at room temperature, which can cause condensation and make the surface sticky.
Serving Ideas and Gifting Tips
Serve your rocky road fudge on dessert platters alongside cookies and brownies for holiday gatherings, or pack individual pieces in lunchboxes for a sweet midday treat. Cut into small bite-sized squares for party buffets where guests can sample multiple desserts without overindulging.
For rocky road fudge gift ideas, arrange pieces in decorative tins lined with tissue paper, or stack them in clear cellophane bags tied with ribbon. Add a printed label with the recipe name and date made. If shipping homemade fudge for gifts, pack pieces snugly in a sturdy box with bubble wrap or crumpled paper to prevent shifting, and choose expedited shipping during warm weather to avoid melting.
Frequently Asked Questions About Rocky Road Fudge
Can I use evaporated milk instead of sweetened condensed milk?
No, evaporated milk and sweetened condensed milk are not interchangeable in fudge recipes. Sweetened condensed milk is thick and contains significant sugar, which is essential for the fudge to set properly. Evaporated milk vs condensed milk in fudge makes a huge difference—evaporated milk will result in fudge that never firms up correctly.
How do I fix rocky road fudge that didn’t set?
If your fudge didn’t set after several hours of chilling, return it to the refrigerator for up to 24 hours—sometimes it just needs more time. If it’s still too soft, you can remelt the mixture, stir in an additional ½ cup chocolate chips to thicken it, then re-chill. This fix for soft fudge usually salvages the batch.
Can I make rocky road fudge without nuts?
Yes, for nut-free rocky road fudge, simply omit the nuts and increase the marshmallows to 3½ cups, or substitute with 1 cup of crushed cookies, pretzels, or Rice Krispies cereal for added texture. The fudge will still set beautifully and taste delicious.
Do I need a candy thermometer for this fudge recipe?
No, this is a true no-thermometer fudge recipe. The sweetened condensed milk method bypasses traditional fudge-making stages entirely, making it beginner-friendly and foolproof.
How far in advance can I make rocky road fudge for the holidays?
This make-ahead rocky road fudge can be prepared up to two weeks before your event if stored in the refrigerator, or up to three months ahead if frozen. This makes it perfect for holiday prep and gift-giving without last-minute stress.
Nutrition and Dietary Swaps
Each 1-inch square of this rocky road fudge contains approximately 120-140 calories, depending on the nuts used and exact portion size. Keep in mind that these values are estimates and can vary based on specific brands and measurements.
For gluten-free rocky road fudge, verify that your chocolate chips and condensed milk are certified gluten-free—most are, but always check labels. To make dairy-free rocky road fudge, use dairy-free chocolate chips and coconut condensed milk (widely available in stores). For nut-free versions, substitute the nuts with seeds like sunflower or pumpkin seeds, or extra marshmallows and crushed cookies.
More Easy Fudge & Chocolate Recipes
If you loved this rocky road fudge, try these other easy chocolate desserts: classic chocolate fudge with just three ingredients, peanut butter fudge squares that melt in your mouth, no-bake chocolate oat bars for a wholesome treat, or rocky road brownies that combine two favorites in one pan. Each of these no-bake dessert recipes delivers maximum chocolate satisfaction with minimal effort—perfect for busy bakers and chocolate lovers alike.
Rocky Road Fudge Recipe (No-Fail, 10-Minute Prep)
Easy Rocky Road Fudge Recipe made with chocolate chips, condensed milk, marshmallows, and nuts. A no-bake, 10-minute holiday treat everyone loves!
24
pieces10
minutes5
minutes230
kcal60
minutes1
hour15
minutesIngredients
2 cups 2 semi-sweet chocolate chips
1 can 1 sweetened condensed milk
½ tsp ½ vanilla extract
2½ cups 2½ mini marshmallows
1 cup 1 chopped nuts (walnuts, pecans, or peanuts)
Directions
- Line an 8×8 or 9×9 baking pan with parchment.
- Melt chocolate chips and condensed milk (microwave 1–2 min or stovetop low heat).
- Stir in vanilla.
- Fold in marshmallows and nuts.
- Spread the mixture evenly in the prepared pan.
- Chill for 1 hour or until firm.
- Cut into squares and serve.
Notes
For firmer fudge, chill at least 2 hours.
Swap nuts for almonds, pecans, or peanuts.
Add a pinch of sea salt for a richer flavor.


)