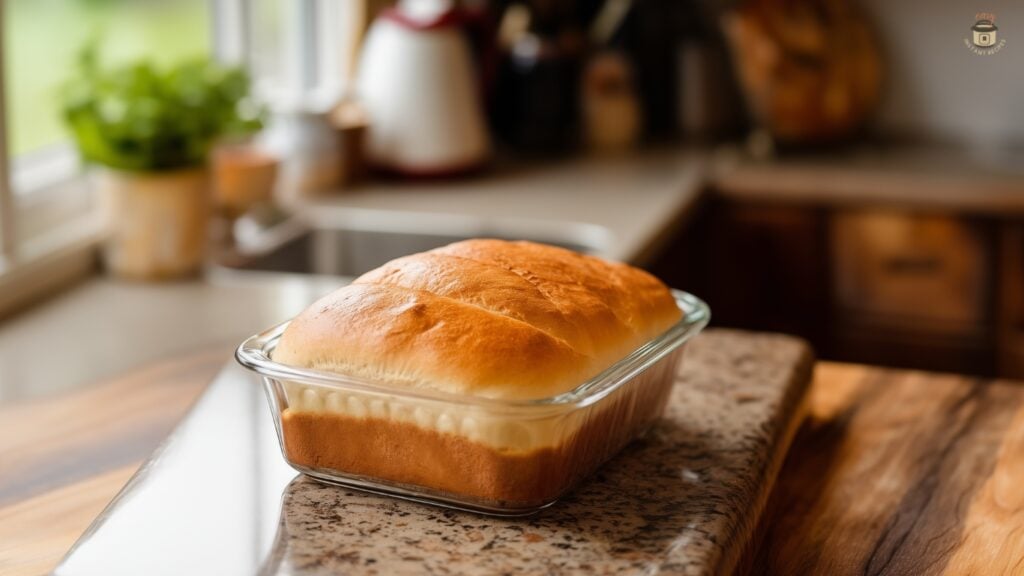
This is one of those recipes that sounds like a gimmick until you try it. You mix everything inside a gallon zip-lock bag, knead the dough right through the plastic, let it rise, shape it, and bake it. No stand mixer, no floured counter, no bowl to scrub afterward. One bag and a loaf pan.
It actually works. The bread comes out soft, fluffy, and golden — the kind of sandwich bread that slices clean and toasts well. And it’s genuinely as easy as it sounds.
Kids love it because squeezing dough through a bag feels more like a game than cooking. Adults love it because there’s almost nothing to clean up. It’s a good recipe to have around.
Jump to RecipeWhat you’re working with
The ingredient list is short: flour, sugar, yeast, warm water, oil, and salt. That’s it. No eggs, no milk, no butter required — though you can brush the top with melted butter right out of the oven if you want a softer crust and a little extra richness.
All-purpose flour works well here. Bread flour will give you slightly more chew and structure if you want a heartier loaf, but all-purpose is what most people have on hand and the results are good either way.
Use rapid-rise yeast (also sold as instant yeast or quick-rise yeast). It skips the step where you have to proof the yeast separately in water — you just add it straight to the dry ingredients. This is what keeps the recipe fast and simple. If you only have active dry yeast, you can use it, but dissolve it in the warm water first and let it sit for five minutes before adding it to the bag.
The water temperature matters. Too cold and the yeast won’t activate. Too hot and you’ll kill it. Aim for 105–110°F — warm enough that it’s comfortable on your wrist but not hot. If you don’t have a thermometer, that’s a good enough test.
How the bag method works
Start with the dry ingredients in the bag — flour, sugar, yeast, salt. Seal it and shake it around to combine. Then add the warm water and oil, squeeze out most of the air, reseal, and start working the dough through the bag.
The kneading takes about 8–10 minutes. You’re looking for a smooth, elastic dough that pulls away from the sides of the bag cleanly. If it’s still sticking all over the place after a few minutes, add a small amount of flour — a tablespoon at a time — through the seal.
Once the dough looks right, leave it in the bag in a warm spot and let it rise until it’s roughly doubled in size. This takes about 30–45 minutes with rapid-rise yeast. A warm oven (just the oven light on, not the heat) works well if your kitchen is cool.
After the rise, open the bag, punch the dough down, and shape it into a loaf. It goes into a greased 9×5 loaf pan for a second short rise — about 20–30 minutes — before baking.
A few things worth knowing before you start
Don’t skip the second rise. It’s shorter than the first, but it matters. Skipping it means a denser loaf that doesn’t open up properly in the oven.
The dough should be tacky but not sticky. If it’s sticking to your hands when you shape it, that’s fine — a little flour on your hands fixes that. If it’s so sticky it won’t hold its shape at all, knead in a touch more flour before the first rise.
Humid days can make the dough wetter than usual. If your kitchen is particularly warm and humid, start with slightly less water and add more only if the dough looks dry.
The bread is done when the top is deep golden brown and the internal temperature hits 190°F. If you tap the bottom of the loaf and it sounds hollow, that’s a good sign too. Don’t pull it early — an undercooked center is the most common mistake with homemade bread.
Let it cool on a wire rack for at least 20 minutes before slicing. Cutting into hot bread compresses the crumb and makes it gummy. It’s hard to wait, but worth it.
Ways to change it up
The base recipe is plain white sandwich bread, which is exactly what it should be. But it’s also a good starting point if you want to add things.
Garlic and herbs: Add a teaspoon of garlic powder and a tablespoon of dried rosemary or Italian seasoning to the dry ingredients. Good alongside pasta or soup.
Whole wheat: Swap one cup of the all-purpose flour for whole wheat flour. The loaf will be slightly denser with a nuttier flavor. Don’t go more than half and half or the texture gets too heavy.
Cheese: Fold in half a cup of shredded cheddar after kneading, before the first rise. It bakes into the bread in little pockets. Works well with the garlic herb version too.
Gluten-free: A 1:1 gluten-free flour blend works as a substitute. The dough will feel different — stickier and less elastic — but it bakes through fine. Don’t expect the same rise.
Storing the bread
Store at room temperature in a bread bag or wrapped loosely — not in a sealed plastic bag, which traps moisture and makes the crust go soft and sometimes promotes mold faster. A linen bag or a loosely wrapped paper bag lets the bread breathe. It stays good for about 3–4 days.
For longer storage, freeze it. Slice the whole loaf first, then freeze in a zip-lock bag. Pull out individual slices as needed and toast straight from frozen. It comes back almost as good as fresh.
Don’t refrigerate bread. The fridge speeds up staling — the starch crystallizes faster at cold temperatures, and you end up with dry, crumbly bread within a day or two. Room temperature or freezer, not in between.
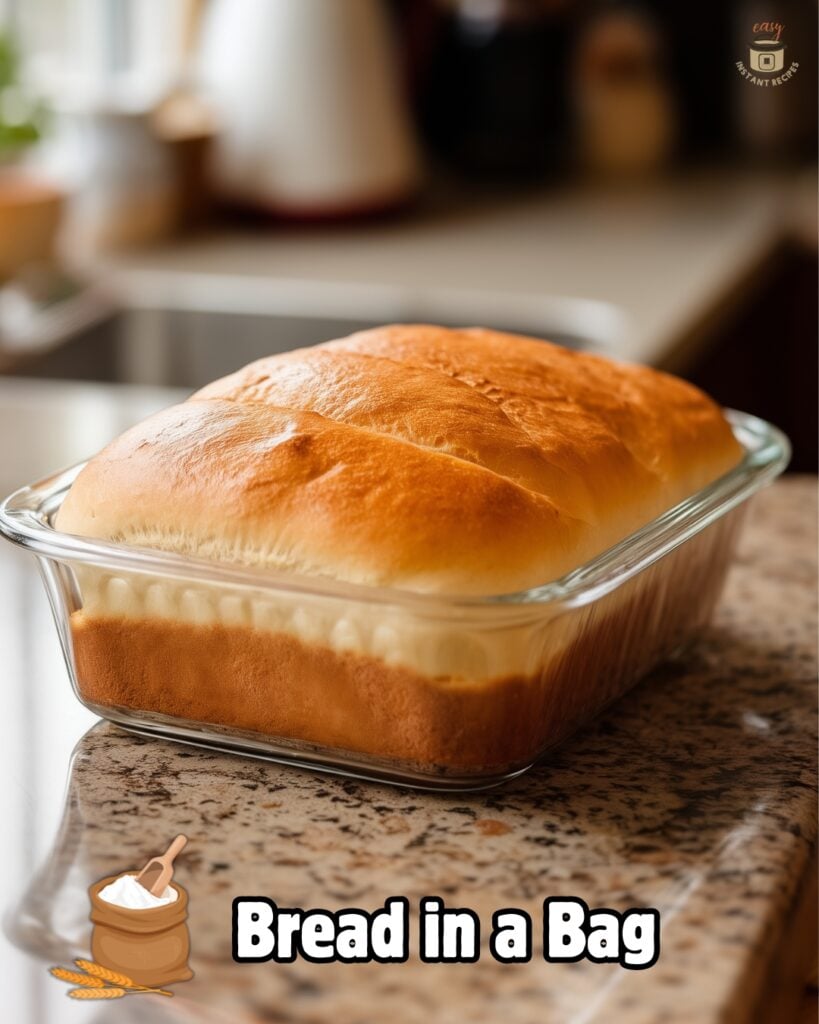

Easy Bread in a Bag Recipe
Soft, fluffy homemade sandwich bread made entirely inside a zip-lock bag — no mixer, no messy counter, almost no cleanup. One bag, a loaf pan, and about an hour and a half.
12
slices15
minutes35
minutes175
kcal1
hour30
minutesIngredients
3 cups 3 all-purpose flour, divided
3 tablespoons 3 Granulated Sugar
1 packet 1 rapid-rise yeast (2¼ teaspoons)
1½ teaspoons 1½ Salt
1 cup 1 warm water (105–110°F)
3 tablespoons 3 Vegetable Oil
2 tablespoons 2 melted butter (optional, for brushing)
Directions
- Add 2 cups of flour, the sugar, yeast, and salt to a large gallon zip-lock bag. Seal and shake to combine.
- Add the warm water and vegetable oil to the bag. Squeeze out most of the air, reseal, and mix by squeezing and working the bag until everything is combined.
- Open the bag and add the remaining 1 cup of flour. Reseal and knead the dough through the bag for 8–10 minutes, until smooth and elastic and the dough pulls away from the sides of the bag.
- Leave the dough in the sealed bag and set it in a warm spot to rise for 30–45 minutes, until roughly doubled in size.
- Preheat oven to 375°F. Grease a 9×5-inch loaf pan.
- Open the bag, punch the dough down, and shape it into a loaf. Place in the prepared pan. Let rise for 20–30 minutes.
- Bake for 30–35 minutes, until the top is deep golden brown and the internal temperature reaches 190°F.
- Brush the top with melted butter if desired. Cool on a wire rack for at least 20 minutes before slicing.
Notes
- Use rapid-rise (instant) yeast for the fastest results — no need to proof it separately.
- Water temperature is important: 105–110°F. Too hot kills the yeast; too cold won’t activate it.
- If the dough is too sticky after kneading, add flour one tablespoon at a time.
- Don’t skip the second rise—it gives the loaf proper lift and a lighter crumb.
- Store at room temperature wrapped loosely for 3–4 days, or freeze sliced for up to 3 months.
- For a make-ahead option: after shaping, refrigerate the loaf pan overnight instead of the second rise. Let sit at room temperature 30 minutes before baking.
Common questions
My dough didn’t rise. What happened? Most likely the water was too hot and killed the yeast, or the yeast was old. Check the expiration date on your yeast packet. If you’re not sure, test it by dissolving a teaspoon of yeast in warm water with a pinch of sugar — it should start foaming within 10 minutes. If nothing happens, the yeast is dead and needs to be replaced.
Can I make this without a loaf pan? You can shape it into a round and bake it on a parchment-lined sheet pan. The loaf will spread a bit more than it rises, so it’ll be flatter and wider, but the flavor is the same.
Can I double the recipe? Yes — use a two-gallon bag if you’re doubling. The kneading takes a little longer but the method is the same. You’ll end up with two loaves.
The bottom of my bread is pale and soft. How do I fix it? Put your loaf pan on the lowest rack in the oven for the last 10 minutes of baking. Direct heat from below crisps the bottom. Alternatively, take the loaf out of the pan for the last few minutes and bake it directly on the rack.
Can I make this ahead? After the first rise and shaping, you can put the loaf pan in the fridge overnight instead of doing the second rise. The next morning, let it sit at room temperature for 30 minutes and then bake as usual. The extra cold fermentation actually develops more flavor.
Looking back at making bread in a bag, I’m struck by the happiness and knowledge gained from making just one loaf. We started with basic ingredients: 2 cups of regular flour, 2 cups of whole wheat, a bit of sugar, and yeast. Mixing these, I saw the dough grow 1.5 times and bake into golden goodness in 30-35 minutes at 350 degrees Fahrenheit. This journey taught me not just how to bake bread, but also the value of the lessons and memories created.
In this process, I learned how important it is to measure ingredients correctly. Getting the dough stiff and the water mix right was key. The mix of flours made the bread just right for everyone. Letting the dough rise perfectly with quick-rise yeast was essential. This needed teamwork, which made sure everyone participated in the baking.
The bread we made was pure and unspoiled. We learned cleanliness is crucial, as our experiment showed. Washing hands with soap kept the bread fresh longer, proving teamwork and cleanliness matter. Making posters about germs added to our learning. This wasn’t just fun; it was a lesson in cooking and teamwork that ended up being so rewarding.
FAQ
What makes Bread in a Bag a great project for beginner bakers?
Bread in a Bag is very simple and clean, perfect for those new to baking. It teaches bread-making basics in a fun, mess-free way.
How can making Bread in a Bag be a fun family activity?
It’s a great project for the whole family. Everyone from kids to adults can help measure and knead the dough. It’s a fun, hands-on way to spend time together and learn to cook.
What are the most important ingredients for making Bread in a Bag?
Good all-purpose flour and the right yeast are key. Flour builds the bread’s base, and yeast makes it rise and get fluffy.
How do I prepare my workspace for making Bread in a Bag with kids?
Make sure your space is tidy with everything you need close by. Use lower tables for kids and safe tools for them to use.
What’s the proper way to mix and knead the dough for Bread in a Bag?
First, mix dry ingredients in the bag, then add wet ones. Seal the bag and use your hands to mix and knead. This keeps everything clean.
Why is the rising time important when making Bread in a Bag?
Rising lets yeast work, making the dough expand and get soft and fluffy. It’s crucial for the bread’s texture and flavor.
What tips do you have for shaping the perfect loaf of bread?
Fold the dough carefully to form your loaf and fit it in the pan. Smooth the ends for a nicer look.
Can I make adjustments to the Bread in a Bag recipe if I live in a particularly humid or dry climate?
Yes, adjust flour or liquid as needed. Add more liquid in dry places, more flour in humid ones for the right dough feel.
Are there ways to customize the basic Bread in a Bag recipe to fit dietary restrictions?
You can use gluten-free flour or dairy-free milk and butter. Choose yeast that matches your diet too.
How should I store my homemade Bread in a Bag to keep it fresh?
Cool it, then store in a bread bag or box. Avoid plastic bags; they can make crust soggy. Freeze slices for longer keeping.


