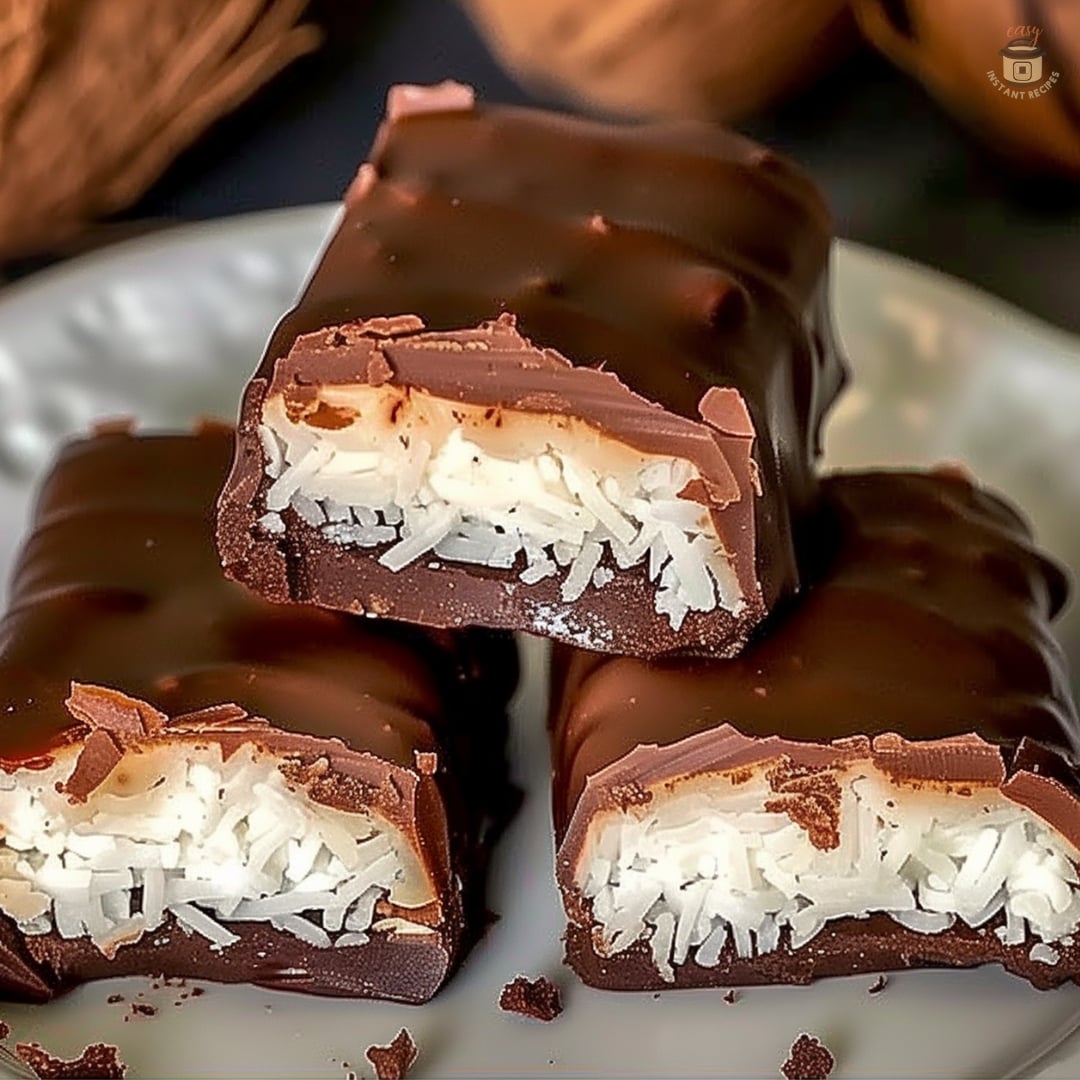
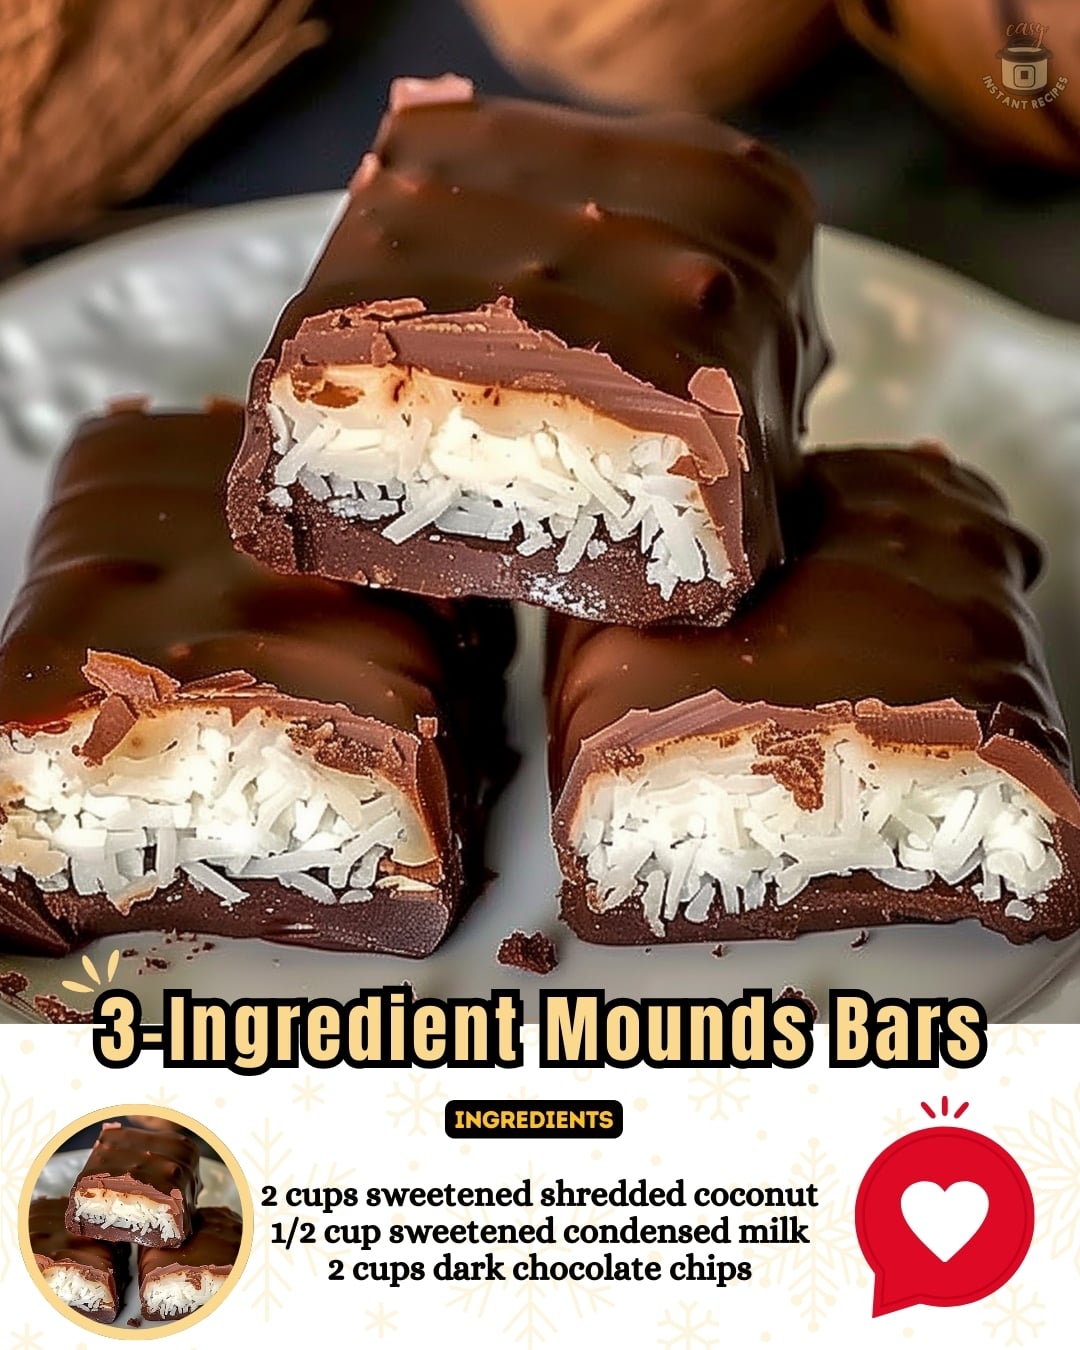
Welcome to the simple joy of making homemade mounds bars. It’s easy and fun. With just three basic ingredients, you can whip up a dessert that everyone will love. You’ll use sweetened shredded coconut, sweetened condensed milk, and dark chocolate chips to make treats that taste like a tropical paradise covered in chocolate. Whether you’re new to baking or an expert, you’ll enjoy making these special treats.
The numbers for this recipe are as simple as it gets. You need 3 cups of coconut, 14 ounces of sweetened condensed milk, and 15 ounces of dark chocolate. First, melt 10 ounces of the chocolate to coat the coconut mix. Then, use the remaining 5 ounces of chocolate for the final touch. After freezing for 20 minutes, you’ll get 12 delicious bars. Each bar has 472 kcal. The best part? These homemade bars are ready in just 1 hour, bringing smiles all around.
Introduction to Homemade 3-Ingredient Mounds Bars
Making Mounds Bars at home is rewarding. It combines freshness with the love of cooking. This recipe is simple, using shredded coconut, sweetened condensed milk, and dark chocolate. You get a snack that’s both rich and satisfying.
The Simplicity of 3-Ingredient Recipes
This Mounds Bars recipe shines because it’s simple. With just three ingredients, you can make these tasty treats in about 30 minutes, plus chilling time. Let’s look at what each component adds:
- Sweetened shredded coconut forms the core, giving a chewy and sweet taste.
- Sweetened condensed milk holds the coconut together and adds creaminess.
- Dark chocolate wraps each bar, offering a smooth contrast to the sweet inside.
Why Mounds Bars?
The focus on Mounds Bars is deliberate. Since 1921, Mounds Bar has been a favorite for its coconut and dark chocolate mix. This makes it a great snack for any time.
Making these bars at home means you can tailor them to your tastes and needs. This is harder with store-bought ones.
| Ingredient | Quantity | Purpose |
|---|---|---|
| Sweetened shredded coconut | 3 cups | Base filling |
| Sweetened condensed milk | 2/3 cup | Binder and sweetener |
| Powdered sugar | 1/2 cup | Additional sweetness |
| Dark chocolate (chips or bars) | 12 ounces | Coating |
The Magic Trio: Ingredients Overview
Making homemade Mounds Bars is simple with just three main ingredients. Each one is crucial for the final taste. Let’s explore why these parts are so important.
Sweetened Shredded Coconut
The main ingredient is sweetened shredded coconut. It gives Mounds Bars their famous chewy and moist texture. With 33% coconut, it brings sweetness and fullness to the bar.
Sweetened Condensed Milk
Sweetened condensed milk keeps the coconut together. It creates a rich, creamy mix that boosts the coconut’s taste. A 14 oz can makes each bar perfectly moist, making them truly irresistible.
Dark Chocolate Chips
Dark chocolate chips add a rich finish to the bars. They make up about 25% of the recipe and melt into a smooth coat. Using premium chocolate like Ghirardelli makes your bars taste professional.
Knowing each ingredient’s role is essential for great Mounds Bars. With coconut, condensed milk, and chocolate chips, anyone can make a delicious treat.
Step-by-Step Guide: Making Your Mounds Bars
Want to make delicious Mounds Bars? I’ve got a guide that’s easy to follow. Making these bars is about bringing happiness into your kitchen.
To start, gather a few basic ingredients. You’ll need unsweetened shredded coconut, coconut milk, coconut oil, maple syrup, and dark chocolate chips. Here’s the process to combine them:
- Mix Ingredients: Take 3 cups (213g) of unsweetened shredded coconut, ½ cup (118 mL) of coconut milk, 2 tablespoons (30g) of melted coconut oil, and ¼ cup (72g) of maple syrup. Mix them in a large bowl until they stick together.
- Shape the Bars: Put the mixture into a lined 8×8 inch pan. Use a spatula or hands to flatten it evenly.
- Chill: Freeze the mix for about an hour to make it firm. This helps to cut and coat it with chocolate later.
- Melt the Chocolate: Heat 1 cup (150g) of dark chocolate chips in a microwave-safe bowl. Use 20-second increments, stirring until smooth.
- Dip the Bars: Cut the coconut base into bars. Dip each bar into the chocolate using a fork, covering all sides. Then, place them back on the baking sheet.
- Final Chill: Put the bars in the fridge until the chocolate is set, about an hour.
Your Mounds Bars are ready to enjoy! These bars are perfect as a special treat or to share with friends. For more great ideas, check out this Mounds Poke Cake recipe. It’s a sure way to add flavor to any occasion.
| Nutrient | Amount | % Daily Value |
|---|---|---|
| Calories | 251 kcal | — |
| Total Fat | 19g | 29% |
| Saturated Fat | 14g | 70% |
| Sodium | 5mg | 0% |
| Potassium | 85mg | 2% |
| Total Carbohydrates | 23g | 8% |
| Fiber | 3g | 12% |
| Sugars | 17g | 19% |
| Protein | 2g | 4% |
| Iron | 2mg | 11% |
Enjoy making and eating your Mounds Bars!
Why Choose Homemade Over Store-Bought?
Making your own Mounds Bars can be more rewarding than buying them. You get a tastier, healthier snack without additives. Let’s explore the benefits of homemade Mounds Bars.
Control Over Ingredients
Making homemade Mounds Bars lets you choose what goes in them. This way, you avoid unnecessary additives found in store versions. You can pick quality ingredients, making your bars healthier and tastier.
Freshness and Flavor
Homemade Mounds Bars taste fresher and better. When you make them at home, they’re full of natural flavor without needing preservatives. This freshness enhances the overall taste and quality.
The table below contrasts the specifications of homemade Mounds Bars versus the typical store-bought Mounds Bar, providing clear insight into the benefits of homemade confections:
| Aspect | Homemade Mounds Bars | Store-Bought Mounds Bar |
|---|---|---|
| Calories per bar | 141 kcal | 213 kcal |
| Control over ingredients | Complete – No preservatives | Limited – Includes preservatives |
| Total fat | 10.2 grams | 12.2 grams |
| Saturated fat | 7.5 grams | 9.0 grams |
| Sugar content | 11.4 grams | 16.7 grams |
| Flavor freshness | Maximum – Made to order | Varies – Often mass-produced |
| Shelf life | Preservative-free; to be enjoyed fresh | Designed for longer shelf life; contains preservatives |
In short, homemade Mounds Bars give you control over your treats. They offer unmatched freshness, flavor, and the joy of eating preservative-free sweets.
Mounds Bars
Discovering a homemade Mounds Bars recipe was thrilling for me. Mounds Bars are loved by many for their coconut and dark chocolate blend. These treats made at home surpass store-bought freshness.
Entering the world of homemade candy is exciting. The recipe is simple but yields a delicious coconut core with dark chocolate. This recipe combines coconut and chocolate perfectly, offering a fresher, personal touch.
Creating these bars is as fun as it is easy, whether you’re nostalgic or love cooking. This recipe offers delightful treats and a great cooking project. It’s perfect for baking alone or with kids.
| Component | Need | Preparation |
|---|---|---|
| Graham Cracker Base | 12 full sheets | Bake for 8 minutes at 350℉ |
| Coconut Layer | 8 ounces of sweetened coconut flakes | Mix with condensed milk and bake for 12-15 minutes |
| Chocolate Topping | 1 1/2 cups dark chocolate chips | Melt and spread over the baked coconut layer |
Homemade Mounds Bars remind you of simpler times. You can ensure the quality of ingredients. Making these bars adds joy to your cooking experiences.
Melting and Tempering Chocolate: Techniques for a Glossy Finish
To get a glossy finish on homemade Mounds Bars, it’s essential to master melting and tempering chocolate. I’ll share vital techniques for handling chocolate. This ensures your treats look and taste perfect.
Melting chocolate requires patience and accuracy. Dark chocolate should melt at a gentle 86°F (30°C) to 90°F (32°C), just below body warmth. This prevents burning and ensures an even melt. Don’t heat dark chocolate above 115°F (46°C). Milk and white chocolates should not exceed 110°F (43°C).
Keep moisture away from chocolate. Even a little water can make chocolate grainy. To blend chocolate with liquid, the liquid must be at least a quarter of the chocolate’s weight.
Tempering chocolate needs precise heating and cooling. Heat your chocolate above 91.5°F (33°C), then cool to 80°F (27°C). This creates a glossy, smooth coat for your bars.
- Choose high-quality chocolate, ideally 72% bittersweet, for the best taste.
- Melt the chocolate gently, using short 15-second bursts in the microwave, checking the temperature.
- Stir the chocolate consistently to avoid overheating parts.
- Cool the melted chocolate at the right temperature for easy use.
These steps improve your bars’ flavor and teach you chocolate techniques for all your baking projects.
Shaping Perfect Bars: Tips and Tricks
Making mounds bars involves both art and science. To ensure your bars look great and taste delicious, understand your coconut mix well. Here, I’ll share tips on improving your bar shaping skills. This way, every batch you make will be as awesome as the previous one.
To start, handling the sticky coconut mix properly is crucial. Wet your hands before scooping the mix to avoid sticking and smooth out the bars. This makes the shaping process neater and more fun. It also keeps each bar looking and tasting great.
Here is an easy way to shape your bars:
- Prepare the Surface: Lay out parchment paper on a tray. This is where you’ll shape the bars.
- Measure Consistently: Scoop equal amounts of the mix. This ensures all bars freeze and dip evenly.
- Shape with Care: Roll the mix into a log shape in your hands. Make sure it’s evenly thick.
- Adjust as Needed: If the bars get misshapen, reshape them gently with your fingers.
- Chill for Stability: Freeze the shaped bars on the tray for 30 minutes. This makes dipping in chocolate easier without them breaking.
By following these steps and using these tips, your mounds bars will look and taste better. They will keep their shape better during dipping and as they set.
| Aspect | Tip | Improvement |
|---|---|---|
| Uniformity | Use a scoop for consistent sizing | Ensures even cooking and appearance |
| Shape Integrity | Freeze before dipping | Prevents bars from breaking during chocolate coating |
| Surface Smoothness | Moisten hands when shaping | Creates a cleaner, more professional finish |
| Finishing Technique | Roll gently between palms | Avoids creating flat spots or misshapen bars |
The fun of making Mounds Bars isn’t just in eating them. It’s also in making them look great by yourself. With a little practice and these tips, you can make bars that might even beat the pros!
Chilling to Perfection: How Long to Freeze Your Bars
When making chilling mounds bars, it’s key to freeze them right for the best texture and snap. Freezing is vital for the quality of your treats.
Start by freezing the coconut bars for 20 minutes before dipping in chocolate. This makes them firm enough to handle. It also ensures the chocolate sets nicely. Without this, the chocolate may not stick well, leading to a messy look.
A good freeze gives mounds bars a crisp chocolate shell. This makes a great contrast with the soft, sweet coconut inside. Let’s look at the freezing steps:
- The bars should first be placed in the freezer immediately after shaping.
- Keep them in the freezer for 20 to 30 minutes or until they are firm to the touch.
- Post-chocolate dipping, another critical chilling phase helps in setting the chocolate. This second freeze time should be around 15 minutes.
- After the chocolate has set, the bars can be transferred to the refrigerator to maintain their texture without becoming too hard.
| Step | Freeze Time | Purpose |
|---|---|---|
| Initial Freezing | 20-30 minutes | Firming the bars for dipping |
| Post-Dipping Freezing | 15 minutes | Setting the chocolate |
| Storage | Keep refrigerated | Maintaining texture |
Following these steps for chilling your bars not only makes them look better but also tastier. Perfect homemade mounds bars are about more than good ingredients and methods. The way you chill and set the chocolate is also crucial.
The Role of Sweetened Condensed Milk in Your Mounds Bars
Sweetened condensed milk is vital for homemade Mounds bars. It adds the perfect sweetness and the right texture. This helps bind the coconut flakes into a dense and satisfying filling.
Creating the Perfect Sweetness and Texture
Sweetened condensed milk keeps the coconut filling moist and sweet. It combines all ingredients, creating a chewy texture and a melt-in-your-mouth feel. These are things you only get with homemade treats.
If you’re watching your dietary restrictions, keeping the right texture might seem hard. But there are many alternatives that work well without changing the bars too much.
Alternative Ingredients for Dietary Restrictions
If you need to adjust your recipe because of dietary needs, consider these options:
- Homemade Sweetened Condensed Milk: You can make your own with milk and a sweetener. This is good if you want to control sugar levels.
- Lactose-Free Condensed Milk: For those who can’t have lactose, there’s lactose-free sweetened condensed milk. It tastes great and works well.
- Plant-Based Condensed Milk: Vegans can choose from soy, almond, or coconut milk versions. This way, anyone can enjoy this treat.
Choosing the right sweetened condensed milk lets you keep the perfect sweetness and texture in your Mounds bars. Whether you’re sticking to the classic recipe or need to tweak it, you can make delicious bars without losing quality.
Storing Your Homemade Mounds Bars
After you’ve got the hang of making yummy Mounds Bars with just three simple ingredients, it’s important to keep them fresh. Here’s the best way to store your treats for now or later.
Optimal Conditions for Freshness
To keep your Mounds Bars fresh, store them in an airtight container. They will stay good for up to five days at room temperature, away from the sun. Just make sure they’re cool before you seal them up. This prevents moisture from making them soggy.
Longevity: Fridge vs. Freezer
Want your homemade Mounds Bars to last beyond five days? Think about putting them in the fridge or freezer. Here’s how each choice helps:
| Storage Method | Typical Longevity | Notes |
|---|---|---|
| Fridge Storage | Up to 2 weeks | Keeps bars softer; may alter texture over extended periods. |
| Freezer Storage | Up to 6 months | Best for long-term storage; wrap bars individually to prevent freezer burn. |
Both fridge and freezer storage keep your bars tasty and ready to eat. Just remember, in the freezer, keep your Mounds Bars away from foods with strong smells to keep them tasting great.
Customizing Your Mounds Bars
Making Mounds Bars at home lets you be creative. You can change the texture or taste however you like. Let’s learn how to switch up the classic recipe. You can add nuts, pick different chocolate types, or use flavor extracts. These changes will make your candy even more special.
Adding Nuts or Flavor Extracts
Putting nuts in your Mounds Bars adds crunch and nutrition. Almonds, pecans, or walnuts work well. They match the coconut and chocolate flavors nicely. If you like unique tastes, using almond or vanilla extract can change the flavor. It makes the coconut taste even better.
Using Different Types of Chocolate
Choosing your chocolate is important for Mounds Bars. You don’t have to stick with dark chocolate. Try milk, white, or even chocolate with flavors like peppermint. Each chocolate changes the taste and texture. This gives you lots of options to try out.
To wrap it up, personalizing Mounds Bars is a fun chance to make them your way. Add nuts, play with different chocolates, or use flavor extracts. Each choice makes your bars unique. Enjoy being creative and make a dessert that’s just how you like it.
Gift-Giving and Presentation Ideas
When thinking about gift-giving, the way you present something like homemade Mounds Bars is key. It’s as crucial as the yummy treat inside. Making these gifts and thinking of fun ways to give them brings joy. Both the giver and receiver feel happy.
Creative Packaging Solutions
To make homemade candy gifts stand out, choose cool packaging. For Mounds Bars, try using shiny cellophane or tiny boxes that show you care. This not only keeps the candies safe but also turns them into a beautiful gift that will brighten someone’s day.
Occasions for Homemade Candy Gifts
Homemade candy is great for many special moments. It’s perfect for birthdays, holidays, or just because. Beautifully wrapped Mounds Bars can make any day special. They’re also great at events like baby showers or office parties, where they bring a personal touch.
Putting time into making and presenting homemade candies means giving a tasty treat and a memorable experience. It’s all about gifting something made with love and creativity.
The Benefits of Making Candy at Home
Making candy at home is not just a fun hobby. It also offers health and personal benefits. By making my own treats, like Mounds bars, I enjoy the major benefits of homemade candy. These include choosing nutritious choices and making sure my treats are free of preservatives.
One big benefit is controlling what goes into my candy. This means I can skip the preservatives found in store-bought candy. By picking healthy ingredients, like organic powdered sugar and unsweetened coconut, my treats are yummier and better for you. I can avoid adding any chemicals or additives, leading to a healthier eating style.
Another plus is being able to change recipes to fit dietary needs. With more people following diets like vegan or gluten-free, homemade candy lets me adjust each ingredient. For example, by using dairy-free butter, I can make treats that everyone can enjoy without worrying about their health.
Looking at the bigger picture, homemade candy wins in freshness and life span. Unlike store-bought candy that might sit on shelves for a long time, homemade candy is fresher. It keeps its great taste and texture longer, especially if stored right in the fridge or freezer.
When it comes to Mounds bars, making them at home lets me create a healthier version. It’s a tasty way to enjoy preservative-free snacks. This honors the classic treat’s taste while keeping up with a health-conscious lifestyle.
| Nutrient | Amount per Serving (2 candies) |
|---|---|
| Calories | 160 |
| Carbohydrates | 16g |
| Fat | 10g |
| Saturated Fat | 5g |
| Sugar | 14g |
| Fiber | 1g |
| Sodium | 42mg |
| Potassium | 96mg |
Pairing Your Mounds Bars with Other Treats
Once you’re good at making Mounds bars at home, try mixing them with other sweets. They are great for dessert ideas. They mix well with many desserts because of their coconut and chocolate taste. This makes your dessert menu even better.
Try these pairing mounds bars ideas to find complimenting flavors:
- Coffee Accents: Mounds bars go well with the strong taste of espresso or cappuccino. It’s a grown-up dessert combo perfect for parties.
- Fresh Berries: Raspberries or strawberries add a fresh tartness. It balances the sweetness of the Mounds bars in your dessert spread.
- Ice Cream: Try them with vanilla or coconut ice cream. The flavors match well, whether side by side or as a topping.
- Nutty Flavors: Adding almonds, pecans, or walnuts gives a nice crunch. It also complements the soft, chewy Mounds bars.
- Yogurt or Oatmeal: For breakfast, sprinkle Mounds bars over Greek yogurt or oatmeal. It’s a sweet way to start the day.
Mounds bars work with many dessert ideas. They’re great for fancy dinners or just making your daily treats more exciting. Their taste can make any ordinary dessert special. Why not try these combinations today?
Mixing flavors and textures can create unique desserts. It can make your meals more interesting and bring joy with every bite.
Conclusion
Making homemade mounds bars is a joyful journey. It’s amazing to mix simple things and make something as good as the famous brands. Learning about Mounds bars history, from their start at Peter Paul Candy Manufacturing to joining Hershey’s, shows our deep connection.
Mounds Bars have been a favorite since 1921. It’s interesting that they were made in big amounts for soldiers in World War II. Today, even though the original factory is gone, their story lives on in our kitchens. Making these bars brings back memories, especially the catchy jingle “Sometimes you feel like a nut / Sometimes you don’t”.
Sharing this mounds bars recipe, I hope you find happiness in making them. The story of Mounds and Almond Joy isn’t just about candy history. It’s about the happy moments that chocolate brings, unique and shared. May your kitchen smell like melting chocolate and toasted coconut, filled with the joy of making something sweet.
FAQ
What ingredients do I need for the 3-ingredient Mounds Bars?
You’ll need sweetened shredded coconut, sweetened condensed milk, and dark chocolate chips.
Can I use milk chocolate instead of dark chocolate for my homemade Mounds Bars?
Absolutely! Milk chocolate or semi-sweet chocolate works well too, according to your taste.
How long does it take to make homemade Mounds Bars?
Preparing the coconut filling takes about 10-15 minutes. Add extra time for freezing and chocolate coating. In a couple of hours, including chilling, they’re ready to enjoy.
Why should I make Mounds Bars at home instead of buying them?
Making them at home lets you control the ingredients and freshness. You avoid preservatives in store-bought versions. Plus, it’s a fulfilling and tasty experience.
Do I need any special equipment to make Mounds Bars?
No special gear needed. Just a microwave-safe bowl for the chocolate, a mixing bowl, a parchment paper-lined tray, and a freezer.
How can I achieve a glossy finish on my chocolate coating?
Properly melt and temper your chocolate. This may include stirring at times and adding solid chocolate to get the right glossy look.
What kind of coconut should I use for the filling?
Sweetened shredded coconut is best for the filling. It has the perfect texture and sweetness for the bars.
How do I store my homemade Mounds Bars, and how long do they last?
Keep them in an airtight container. They last up to five days at room temp, two weeks in the fridge, and months in the freezer.
Can I add other ingredients to my Mounds Bars recipe?
Yes, customize your bars. Add nuts, different extracts, or try various chocolates to match your flavor likes.
I have dietary restrictions. Can I still make Mounds Bars?
Yes, you can find alternative ingredients like dairy-free condensed milk to fit different diets.
How do you shape the perfect Mounds Bars?
Wet your hands to handle the sticky coconut mix. Shape even logs and freeze on parchment before dipping in chocolate to keep their shape.
Are homemade Mounds Bars suitable for gift-giving?
Yes! They’re a thoughtful, customizable gift. Get creative with the packaging to make them extra special for any event.
What are the benefits of making candy at home?
Home candy making is healthier without preservatives, lets you pick nutritious ingredients, and is fun to do from scratch.
How can I pair Mounds Bars with other desserts?
They’re great with coffee, fruits, nuts, ice cream, or even crumbled over oatmeal. Mounds Bars complement many desserts and flavors.