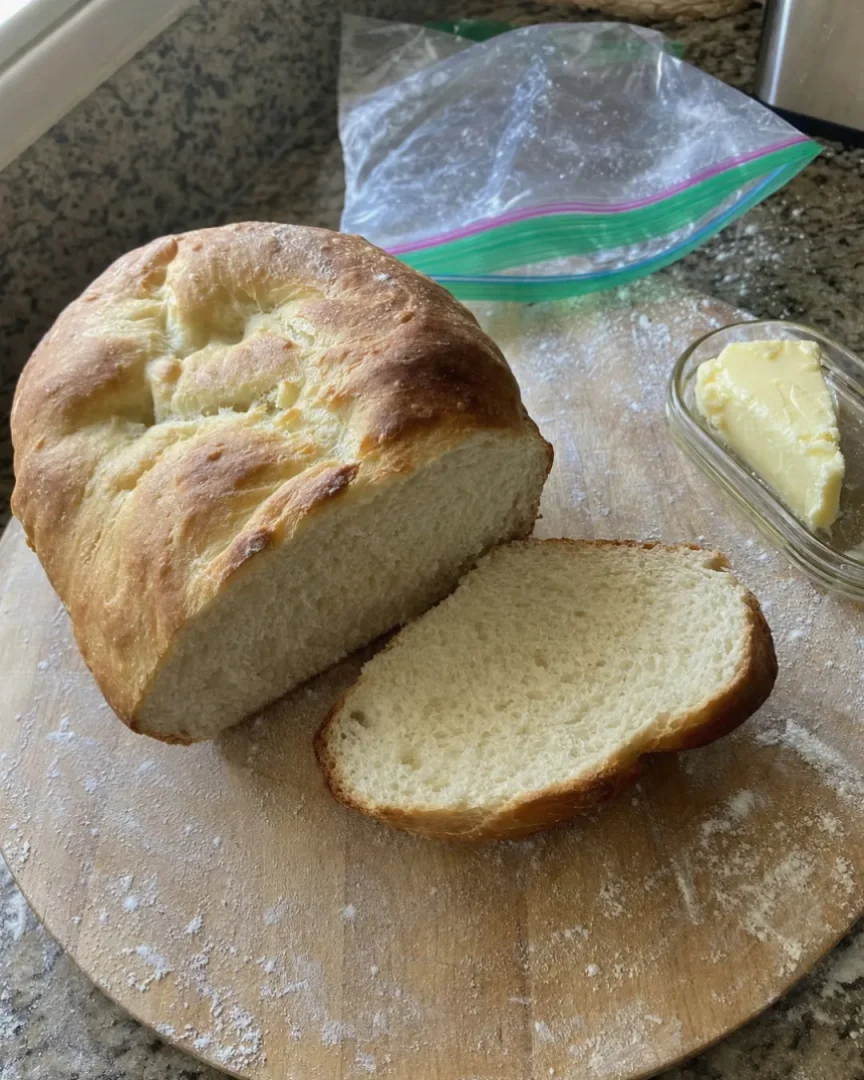
This bread in a bag recipe is one of those projects that actually delivers on its promise — fresh, soft, warm bread with almost no cleanup and no special equipment. Whether you are baking with kids on a rainy afternoon or just want to understand how yeast bread works without committing to a complicated process, this is the recipe to start with. It uses simple pantry staples, comes together in a zip-top bag, and produces a genuinely good loaf of soft homemade sandwich bread.
Why You’ll Love This Bread In A Bag Recipe
There is no mixer, no dough hook, and no fancy bread pan required. Everything happens inside a sealed bag, which means less mess and more fun — especially if you are doing this as a hands-on baking activity for children.
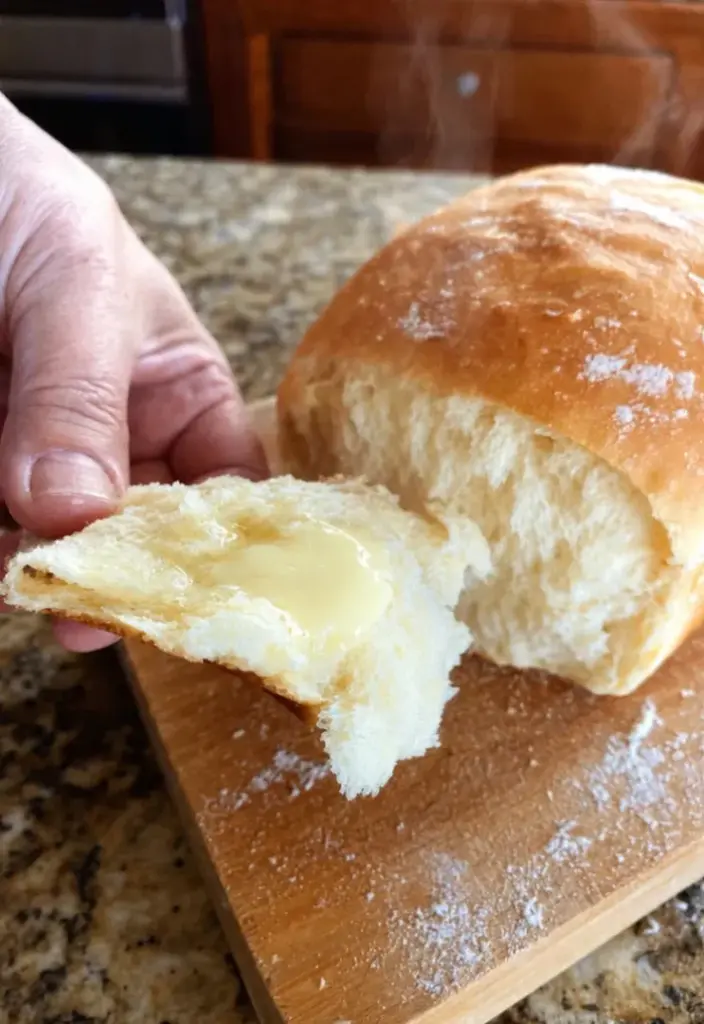
It is also a real yeast bread, not a shortcut loaf. You get the rise, the golden crust, and that warm fresh-baked bread smell coming out of the oven. Kids and beginners alike tend to feel genuinely proud of the result because it looks and tastes like the real thing. Check out our related guide for more tips.
This is also a fantastic classroom bread recipe. The steps are simple enough to follow in a group setting, the bag keeps things contained, and the whole process from mixing to baked loaf is easy to manage in a couple of hours. If you enjoy baking projects like this, you might also love this Pineapple Upside Down Bread Recipe for your next bake day.
What You Need For This Recipe
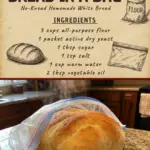
This is a straightforward all-purpose flour bread recipe with no unusual ingredients. Here is exactly what goes into it:
- 3 cups all-purpose flour
- 1 packet active dry yeast
- 1 tablespoon sugar
- 1 teaspoon salt
- 1 cup warm water
- 2 tablespoons vegetable oil
That is the complete ingredient list. Nothing more, nothing less. Simple white bread at its most honest.
Understanding Your Ingredients
All-Purpose Flour
All-purpose flour gives this loaf enough structure without making it dense or chewy. It is the right choice for a beginner bread baking project because it is forgiving and easy to work with. Bread flour would create a chewier texture, but for a soft sandwich-style loaf, all-purpose is exactly what you want here.
Active Dry Yeast
One packet of active dry yeast is the engine behind this recipe. Unlike instant yeast, active dry yeast benefits from being activated by warm water before it does its job, which is exactly what happens when you pour the warm water into the bag. The sugar in this recipe also helps feed the yeast, giving it the fuel it needs to make the dough rise properly.
Water temperature matters here. You want it warm — around 100 to 110 degrees Fahrenheit. Too cold and the yeast stays dormant. Too hot and you risk killing it. If you do not have a thermometer, aim for water that feels comfortably warm on your wrist, not hot.
Sugar, Salt, and Oil
The sugar does double duty: it feeds the yeast and adds just a touch of flavor. Salt controls the yeast activity and brings out the overall taste of the bread. The vegetable oil keeps the crumb tender and gives the loaf a soft texture rather than a tough crust. These three ingredients are doing quiet but important work in the background.
How To Make Bread In A Bag
Step 1: Add Dry Ingredients To The Bag
Start by adding the flour, yeast, sugar, and salt to a large zip-top bag. A gallon-size bag works well here. Seal it and give it a gentle shake to combine everything evenly before you add any liquids.
Step 2: Add Warm Water and Oil
Open the bag and pour in the warm water and vegetable oil. Seal the bag again, pressing out as much air as you can before you close it fully. This makes the next step easier and more effective.
Step 3: Squish Until Dough Forms
This is the part that makes this a truly fun cooking activity for kids. Squeeze, press, and squish the bag until the flour is fully incorporated and a shaggy dough forms. Keep working it until the dough pulls together into a cohesive ball with no dry floury patches remaining.
The bag does the work of containing the mess while your hands do the mixing. It takes a few minutes of steady squishing, but you will feel the dough come together and become smoother as you go.
Step 4: Knead Lightly and Shape
Once the dough has formed, open the bag and turn the dough out onto a lightly floured surface. Knead it gently for just a minute or two — this is not a heavy-handed kneading process. You are just smoothing it out and building a little surface tension before you shape it.
Shape the dough into a loaf by flattening it into a rough rectangle, folding the sides in, and rolling it up from one end. Pinch the seam closed and place it seam-side down on your baking sheet.
Step 5: Place On A Greased Baking Sheet
Grease your baking sheet lightly with oil or cooking spray before placing the shaped loaf on it. This prevents sticking and helps the bottom of the loaf develop a slightly crisp, golden base.
Step 6: Let It Rise
This is the part that requires patience, and it is also the part that makes all the difference. Let the dough rise in a warm spot until it has doubled in size. This typically takes 45 minutes to an hour, depending on how warm your kitchen is.
A good trick is to place the baking sheet in an oven that has been turned off after being briefly warmed to about 100 degrees Fahrenheit, or simply set it on top of the stove in a draft-free spot. The dough should look noticeably puffier and feel soft and airy when you gently press it.
Step 7: Bake at 375°F Until Golden Brown
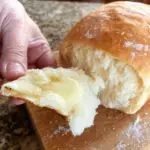
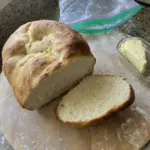
Bake the loaf at 375 degrees Fahrenheit until it is golden brown on top. The exact time will vary depending on your oven, but a hollow sound when you tap the bottom of the loaf is a reliable sign that it is fully baked through. Let it cool on a wire rack for at least 15 minutes before slicing so the crumb has time to set.
Tips For Getting This Right
Do Not Rush the Rise
The rise is not optional and it cannot be significantly shortened. Yeast needs time to do its work, and a loaf that has not fully doubled will be dense and heavy. Give it the time it needs and your loaf will reward you with a light, open crumb.
Check Your Yeast Before You Start
If your active dry yeast is old or has been stored improperly, it may not be active anymore. A simple way to check is to dissolve it in the warm water with the sugar and wait a few minutes. If it becomes foamy and bubbly, it is alive and ready to use. If nothing happens, the yeast is no longer active and the bread will not rise.
According to King Arthur Baking, yeast stored in a cool, dry place stays active much longer than yeast kept in a warm pantry. Keeping an unopened packet in the refrigerator or freezer is a good habit.
Flour Measurement Matters
Scooping flour directly from the bag with your measuring cup packs it down and can lead to using too much, which makes the dough stiff and the bread dense. Spoon the flour into your measuring cup and level it off with a straight edge for a more accurate measurement. The Serious Eats guide on measuring flour explains this well if you want to understand the difference it makes.
The Bag Size Matters
Use the largest zip-top bag you have. A gallon-size bag is the minimum — the dough needs room to move as you squish it. A two-gallon bag gives you even more working room and makes the process less awkward, especially for smaller hands.
Making This A Baking Activity For Kids
This ziplock bag bread recipe was practically designed with kids in mind. The squishing step is genuinely entertaining, the process is tactile and hands-on, and the result is something they can actually eat and be proud of. There is no hot equipment involved until the oven stage, so children can participate in almost every step.
For a classroom setting, you can set up individual bags for each child or pair children up to work together. The recipe scales cleanly, and the bag keeps flour contained on even the messiest tables. If you are looking for more baking projects that are equally satisfying, this Sweet Alabama Pecan Bread Recipe is another crowd-pleaser worth bookmarking.
Bread making with kids works best when you set up all the ingredients ahead of time so the process flows smoothly. Pre-measuring everything into small bowls lets kids focus on the fun parts — adding, sealing, and squishing — without the lesson getting bogged down in measuring.

Easy Bread In A Bag Recipe
Fresh, soft, warm bread made with almost no cleanup and no special equipment. Everything happens inside a zip-top bag, making it a perfect hands-on baking activity for kids and beginners. It uses simple pantry staples and produces a genuinely good loaf of soft homemade sandwich bread.
Ingredients
- 3 cups all-purpose flour
- 1 packet active dry yeast
- 1 tablespoon sugar
- 1 teaspoon salt
- 1 cup warm water (100–110°F)
- 2 tablespoons vegetable oil
Directions
Add the flour, yeast, sugar, and salt to a large gallon-size zip-top bag. Seal it and give it a gentle shake to combine everything evenly before adding any liquids.
Open the bag and pour in the warm water and vegetable oil. Seal the bag again, pressing out as much air as possible before closing it fully.
Squeeze, press, and squish the bag until the flour is fully incorporated and a shaggy dough forms. Keep working it until the dough pulls together into a cohesive ball with no dry floury patches remaining.
Open the bag and turn the dough out onto a lightly floured surface. Knead it gently for just a minute or two to smooth it out and build surface tension.
Shape the dough into a loaf by flattening it into a rough rectangle, folding the sides in, and rolling it up from one end. Pinch the seam closed.
Lightly grease a baking sheet with oil or cooking spray. Place the shaped loaf seam-side down on the prepared baking sheet.
Let the dough rise in a warm spot until it has doubled in size, approximately 45 minutes to 1 hour.
Bake at 375°F until golden brown on top. Tap the bottom of the loaf — a hollow sound indicates it is fully baked. Let it cool on a wire rack for at least 15 minutes before slicing.