A no-bake dessert that layers rich chocolate flavors with creamy textures, making it the perfect indulgence for any chocolate lover.
Ingredients
Scale:
36 Oreo cookies, crushed
6 tbsp butter, melted
8 oz cream cheese, softened
¼ cup sugar
2 boxes (3.9 oz each) instant chocolate pudding
3 cups cold milk
16 oz whipped topping, divided
Chocolate shavings or crushed Oreos for topping
Instructions
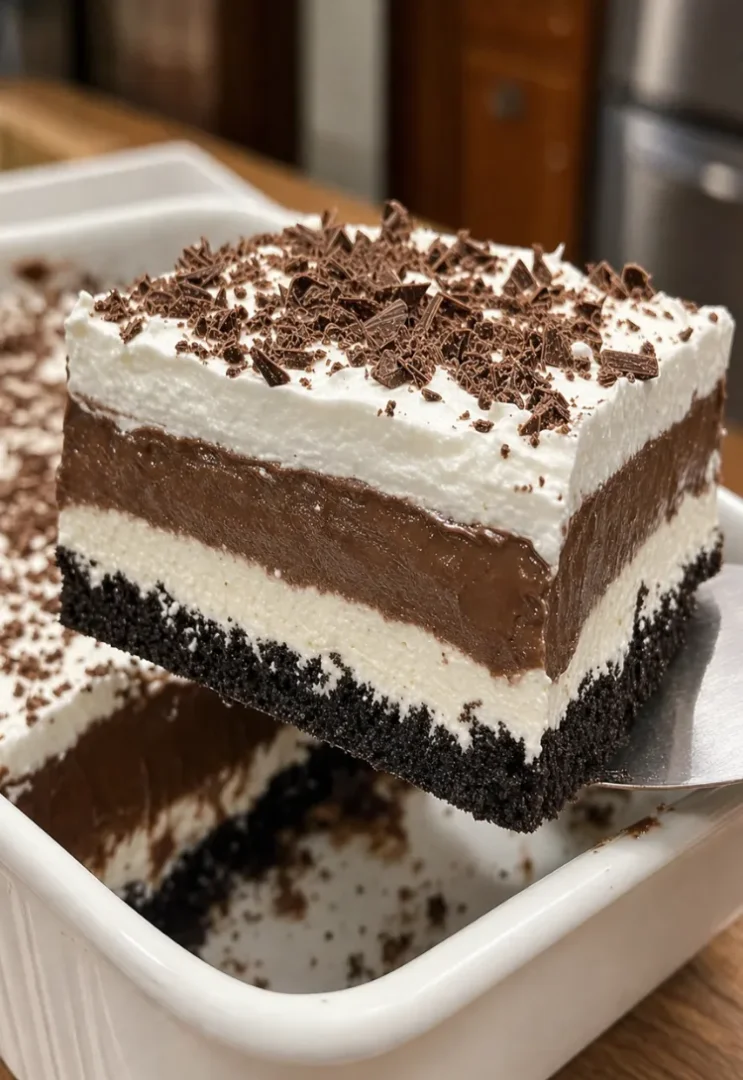
Mix crushed Oreos with melted butter. This combination creates a deliciously rich crust that forms the base of your lasagna. The melted butter helps the crumbs bind together, ensuring a sturdy foundation. Take care to incorporate all crumbs so that every bite of the crust is equally flavorful.
Press into a 9x13-inch dish and chill for 10 minutes. Chilling helps the crust firm up before adding more layers, making it easier to work with. A slight chill also prevents the crust from becoming too soft when the layers are added. A firm crust will give you a better slice.
Beat cream cheese and sugar until smooth. It's important to get rid of any lumps for a creamy filling; a hand mixer is ideal for this. Take your time to make the mixture velvety. Ensure that the cream cheese is truly at room temperature for the best results.
Fold in 1½ cups whipped topping. This adds lightness to the cream cheese mixture, making it fluffy. Be gentle when folding to maintain the airy texture you desire. This step is crucial for achieving that light, creamy filling that will contrast beautifully with the dense pudding layer.
Spread over crust carefully. Use a spatula to smooth it out, ensuring even coverage. This layer should be thick enough to hold its shape but not too overwhelming; it needs to balance the other layers perfectly.
Whisk pudding mix with cold milk until thick. This step is essential for achieving that rich pudding layer. Follow the instructions on the pudding box, ensuring it sets to the right consistency. Be sure to whisk vigorously for a smooth pudding without lumps.
Spread pudding layer over cream cheese mixture. Again, take your time to ensure an even layer. This will create a beautiful contrast against the cream cheese layer below. A careful spread will help keep the layers distinct.
Top with remaining whipped topping. This creates a light, airy finish on your dessert. Feel free to create swirls or peaks for an added touch of elegance. Don’t hesitate to be creative with this step, as the topping is the finishing touch that can elevate the appearance.
Sprinkle chocolate shavings or crushed Oreos on top. This adds a nice decorative touch and extra flavor; consider using a microplane for fine shavings or simply crush Oreos in a zip-top bag for a coarser topping. A mix of both can add texture and visual interest.
Chill for at least 4 hours before slicing. This is where the magic happens as the layers set perfectly. The longer it chills, the more deliciously integrated the flavors become. This time allows for the ultimate flavor melding, ensuring that every slice is as delightful as the last.