Think of the smell of fresh bread in your kitchen. Making bread in a bag is an easy journey to creating your delicious loaf. As someone who loves baking at home, I’ve loved following these simple steps. They show the joy of making bread at home with no mess. Just using a bag and some basic things you have around. This way, anyone can turn their kitchen into a small bakery and make lots of soft, fresh bread. What’s even more exciting? Seeing the soft, golden crust come out of the oven shows you’ve made something special.
Let’s get ready, gather what we need, and start this bread-making journey. It’s totally worthwhile, giving tasty results and a feeling of achievement. If you’re like me, you’ll feel super proud of your bread. You might even want to share it with friends or on social media. Imagine your bread in a bag post becoming a hit online!
Key Takeaways
- Uncover the pleasure of making bread in a bag, ideal for home bakers looking for a hassle-free baking experience.
- Delve into a step-by-step guide that promises a tasty loaf of homemade bread with a delightful fluffy texture.
- Each recipe yields two loaves, doubling the joy of your baking endeavor.
- The process requires just a cup of warm water and a packet of rapid rise yeast to get started.
- Learn the importance of resting times: 10 minutes initially, then 30 minutes for the dough to rise perfectly.
- Embrace the warmth of baking at 375 degrees Fahrenheit for a glorious 35 minutes or until golden brown.
- Discover the satisfaction of shaping your own bread, making it an engaging and creative kitchen activity.
Introduction to Bread in a Bag
Welcome to the amazing world of bread in a bag recipe. Here, the basics of baking basics are easy and fun for all. This recipe makes bread-making simple and provides a fun way to make homemade bread that tastes great. It’s perfect for beginners or experts who want to teach kids the joy of baking.
Why choose bread in a bag? This method reduces mess and complexity. You mix everything in a sealable plastic bag, which means less cleaning. Also, kneading the dough in the bag is great for kids to get involved!
Imagine the fun and delicious smells in your kitchen with this recipe. You’ll need simple items like flour, yeast, sugar, and salt. The whole activity, from start to enjoying your bread, takes about an hour and a half. It’s time well spent making memories and learning to bake.
The bread in a bag recipe helps you feel confident about baking. It guides you from mixing to kneading, rising, and finally baking, all in a kitchen bag. This method simplifies baking and helps you understand how simple ingredients become bread.
In our article series, you’ll find more tips to enhance your baking. By trying this method, you enter a world where baking is easy, fun, and tasty. Get ready to wow yourself, improve your cooking, and make wonderful moments with loved ones.
The Joy of Making Bread with Kids
Introducing kids to bread-making is truly special. This process turns creating a loaf of bread into an amazing learning journey. It not only teaches them vital life skills but also boosts their creativity in the kitchen.
The “Bread in a Bag” method is perfect for kids. It’s simple and fun, making it great for young bakers. With less mess, it’s ideal for their little hands.
- Measuring ingredients teaches precision and introduces fractions and arithmetic.
- Kneading the dough improves motor skills and lets kids create from scratch.
- Seeing the dough rise teaches them about science, showing how yeast works.
Creativity is key in bread-making with kids. Every step can be a lesson in creativity. From selecting bread shapes to adding unique ingredients, kids can make their bread special.
Jumping into cooking lessons with this activity is exciting. Kids use simple ingredients to see results in about an hour. This keeps them interested and engaged.
| Ingredient | Quantity | Role in Bread Making |
|---|---|---|
| All-purpose flour | 3 cups | Main structure and gluten development |
| Active dry yeast | 2 1/4 teaspoons | Leavening agent that helps the bread rise |
| Warm water | 1 cup (about 110°F) | Activates the yeast and hydrates the flour |
| Sugar | 3 tablespoons | Feeds the yeast and enhances flavor |
| Salt | 2 teaspoons | Flavor enhancer and yeast growth regulator |
| Oil | 3 tablespoons | Improves crumb texture and prolongs shelf life |
Bread-making teaches kids more than cooking; it teaches patience and diligence. Enjoying the bread they made themselves is rewarding. Such kitchen moments can shape a child’s growth for years to come.
Gathering Your Ingredients for Bread in a Bag
Starting off with making bread at home is exciting. It’s key to pick the right stuff and know what each does. Today, I’m making homemade bread in a bread bag. The essentials are all-purpose flour, rapid-rise yeast, warm water, sugar, salt, and vegetable oil.
All-purpose flour is a top pick for bread-making beginners. It strikes the perfect balance, offering just enough protein for softness and structure. It leads to a soft, fluffy bread, which is my goal. For the dough, I find 3 cups of all-purpose flour ideal for the best consistency.
Choosing the Right Type of Flour
Choosing flour is crucial for bread’s texture and rise. All-purpose flour is my favorite for its versatility and great baking results. It helps the dough rise nicely, making the loaf light and airy.
Understanding the Role of Yeast in Bread Making
Rapid-rise yeast is essential for my recipe. It works faster than active dry yeast, making the dough rise quickly. It’s perfect for breads that don’t need a second rise. For my recipe, 2 ¼ teaspoons of this yeast are enough to make the dough perfect.
This ingredient mix not only makes the process easy but also ensures delightful bread. With these items, making a tasty treat for the kitchen is simple.
Finally, storing baked bread well is key for its freshness. A bread bag is not just useful in the baking. It also keeps the bread soft and yummy for longer.
Preparing Your Workspace
Getting your space ready to make Bread in a Bag is important. It makes the process smoother and safer, especially for kids. This preparation makes baking fun and efficient.
Organizing Ingredients for Easy Access
Gather all your ingredients and tools first. Place them in order of use, from flour to salt. This saves time and keeps you organized during baking. If making multiple loaves, have extra measuring tools ready to avoid any mix-ups and keep things flowing smoothly.
Creating a Kid-Friendly Cooking Environment
Making your kitchen welcoming for kids is key. Ensure they can easily reach everything. Provide a low table or a stable stool for safe access to the counter. The aim is to combine safety with fun, giving kids the chance to learn cooking in a safe space.
Keeping your workspace tidy is also important. Since mixing and kneading happen in the bag, it’s less messy. This setup invites kids to join in every step without worrying about a big clean-up.
| Ingredient | Amount Per Batch | Function |
|---|---|---|
| All-Purpose Flour | 3 cups, divided | Base for dough |
| White Sugar | 3 tablespoons | Feeds yeast, adds slight sweetness |
| Rapid Rise Yeast | 1.25 packages (equivalent to 2 1/4 teaspoons) | Leavens bread, allows it to rise |
| Warm Water | 1 cup (105-110 degrees Fahrenheit) | Activates yeast |
Through every step, from setting up to watching the dough rise, kids learn and have fun. They get hands-on experience with measuring and learn some math too. This experience is enjoyable and educational.
A well-set kitchen and a friendly space make cooking together special. It builds a love for baking and creates lasting memories.
Mixing the Dough: A Step-by-Step Guide
Making bread in a bag makes cleaning up easier and improves the mixing experience. It helps mix all ingredients well. In this guide, I’ll show you how to mix and knead dough inside the bag for the best texture.
Combining Dry and Wet Ingredients
Start with the dry ingredients. Use all-purpose flour with 10-14% protein for most breads. It’s best to weigh flour, salt, and yeast for accuracy. This way, you’ll get the same results in texture and taste every time.
Warm water is key for the wet ingredients. It should be between 105 to 110ºF to activate the yeast. If using a pre-ferment like a sponge, ensure it’s the same temperature to keep the yeast active.
Kneading in the Bag for Perfect Texture
Put the dry and wet ingredients in the bag. Remove most air and seal it. Then, knead through the bag to mix everything well. Usually, kneading for 5 to 10 minutes is enough.
- Use the autolyse method by letting the dough rest for 30 minutes before kneading. This rest helps the flour absorb water and makes gluten stronger with less effort.
- When the dough pulls from the bag, it means the gluten network is forming well. This is key for the dough’s elasticity and for baking a great bread.
- Before taking the dough out, dust a little flour on the surface. Make sure the dough has doubled in size, showing it fermented well for a good rise.
This bread in a bag method makes mixing and kneading dough easier and cleaner. It’s fun and simple whether you’re experienced or new to baking. This way, you can enjoy baking more without worrying about the mess.
Rising to the Occasion: Letting the Dough Rest
In breadmaking, letting dough rise and bread proofing is crucial. This stage is where yeast activation makes the dough light and airy. That’s key for delicious bread.
Let’s look at the main steps and times for effective dough resting and rising:
- Initial Rest: The dough rests for 20 minutes after mixing. This starts gluten development.
- First Rise: It rests at room temperature for 2 hours or until it nearly doubles.
- Stretch and Fold: During the first rise, do a ‘stretch and fold’ three times at 30-minute intervals. This helps with structure.
- Second Rise (Proofing): After shaping, the dough rises for an hour. This is key for the final bread’s structure and volume.
- Refrigeration (Optional): For deeper flavor, you can refrigerate the dough. Keeping it in the fridge for 8 to 14 days enhances flavor.
These steps make sure the dough rising and bread proofing happen well. It brings out the best in yeast activation.
Here’s a simple bread proofing schedule to follow:
| Phase | Duration | Description |
|---|---|---|
| Initial Rest | 20 minutes | Rest after initial mixing, before folding. |
| First Rise | 2 hours | Room temperature rise until dough nearly doubles. |
| Stretch and Fold | 1.5 hours (spread over 3 intervals) | Performed during the first rise to strengthen gluten networks. |
| Second Rise (Proofing) | 1 hour | After shaping, allows dough to finalize its structure. |
| Refrigeration | 8 to 14 days | Optional for flavor development; dough used within this timeframe. |
By allowing your dough enough time to rise and using these steps, you’ll get bread that’s tasty and perfectly textured due to yeast activation.
Shaping and Baking Your Loaf
To make a loaf that looks good and tastes great, it’s key to know how to shape and bake it. Turning dough into a loaf with a lovely golden crust begins well before the oven heats up. Let’s look at tips that make your Bread in a Bag the best.
Shaping your dough correctly is very important. For a loaf that’s perfect for sandwiches, aim for a dough weight of about 1400g. This fits well in 9″x5″ pans and gives the loaf a nice size and texture. A wetter dough means the bread stays moist as it bakes, supported by the pan.
Creating an envelope shape with your dough adds structure. This method leads to a soft, evenly spaced crumb. For softer crust, let the dough rise in the fridge overnight. It makes the bread rise better and become airier. After this, if poking the dough makes it slowly bounce back, it’s ready for baking.
You don’t need to cut into the dough before baking it in a pan. This helps it rise evenly and keep its shape while baking. Here’s a table that shows how to prepare your dough for a great loaf shape.
| Parameter | Preparation Detail |
|---|---|
| Dough Weight | 1400g for standard pan loaves |
| Folding Technique | Envelope fold to structure |
| Hydration Level | Higher for structural integrity |
| Proofing Strategy | Overnight in fridge to soften crust formation |
| Scoring | Not required for pan loaves |
When it comes to baking, the oven temperature is key. Use 375°F for a beautifully baked crust. Make sure to preheat your oven well, especially with a baking stone. It helps create an artisan-style crust.
Mastering loaf shaping and timing is vital for perfect bread. Each time you bake, you get better. This leads to many golden, delicious loaves filling your kitchen with a delightful aroma.
Essential Tips for Soft & Fluffy Bread
Making a soft and fluffy loaf is more than just recipe following. It’s about knowing the little things that make baking perfect. I want to share baking advice and recipe adjustments. They will help make your baking day a win. Here are ideas to help you dodge common mistakes and become a bread-making pro.
It’s key to know how the weather affects your baking. On humid days, your dough might be stickier. You may need to add a bit more flour to get the dough right. A Korean Ppang recipe taught me the importance of adjusting ingredients for perfect texture.
Here’s a tip for a fluffy loaf: watch the temperature where you bake. If it’s cold, let your dough rise longer. Bread yeast is very picky about temperature. To stop your bread from being dense, try the finger poke test. If the dough bounces back slowly and leaves a mark, it’s ready for the oven.
To get a bread that looks and tastes great, be careful with baking. Heat the oven to the right temperature before starting. Your bread is done when it hits 190°F inside.
Also, let your bread cool on a rack. This stops the bottom from getting wet. This resting time makes the crust and texture just right, giving you the best bread experience.
With these soft bread tips, fluffy loaf methods, and baking advice, you’ll be ready for any baking challenge. This know-how ensures tasty loaves every time. It also brings extra love and care to what you bake.
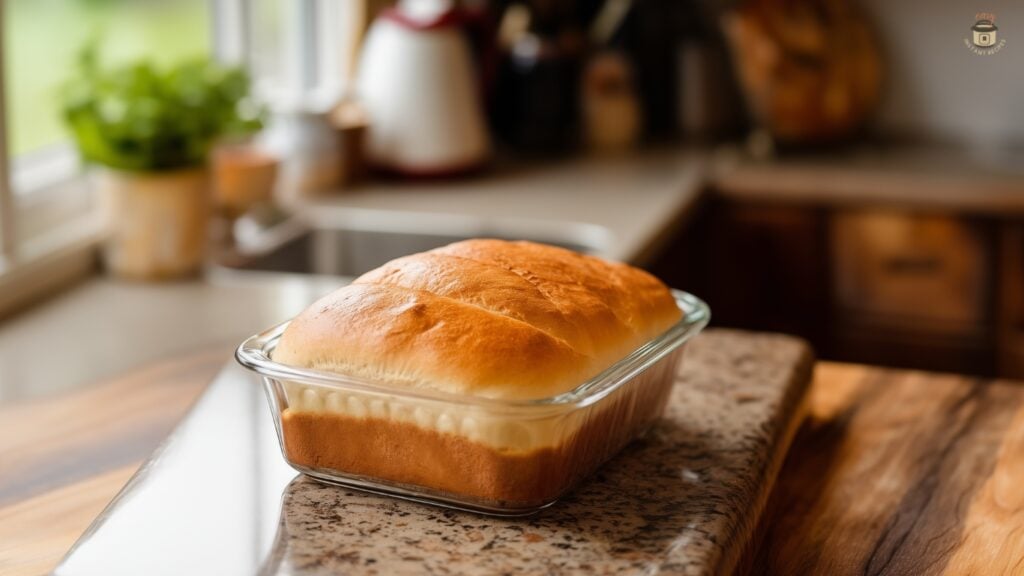
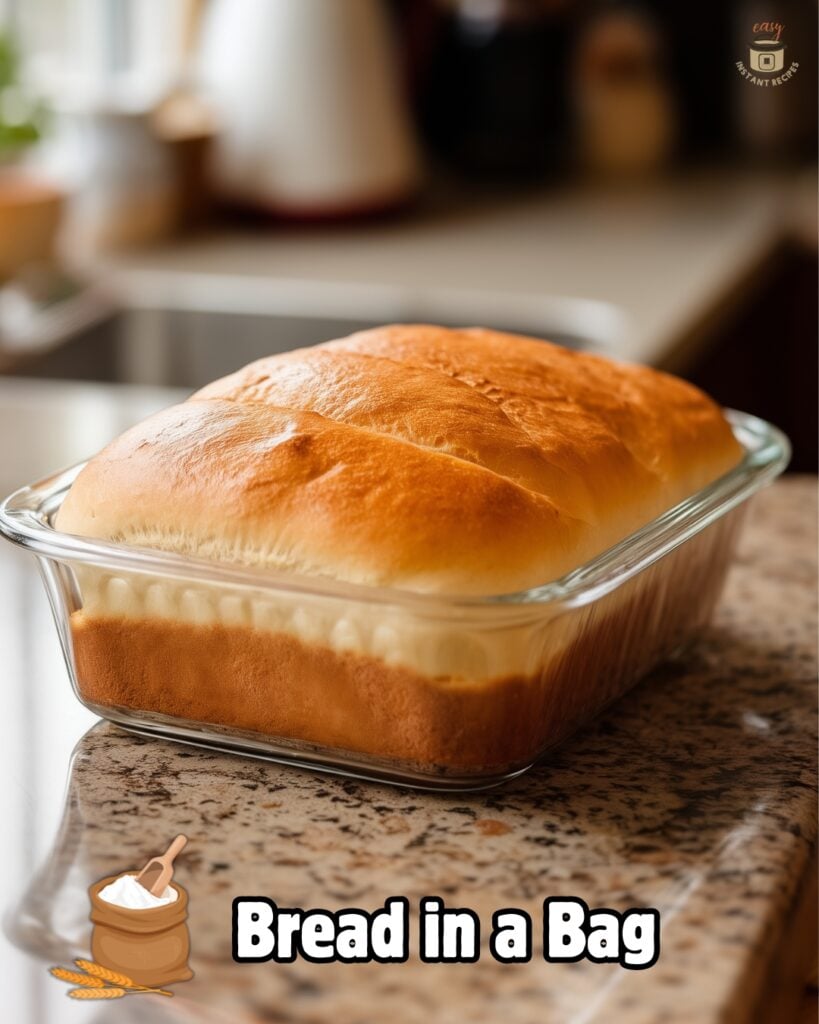
Bread in a Bag
Discovering the bread in a bag process changed how I bake at home. It’s neat, fun, and great for any baker. Let’s explore why this method is so easy and appealing.
It all starts with a large resealable plastic bag. Think of it as a clean, easy mixing bowl. You’ll add flour, sugar, yeast, warm water, oil, and a bit of salt into the bag. Let’s break down the essentials for making it:
| Ingredient | Quantity | Function |
|---|---|---|
| Flour | 3 cups | Provides the structure |
| White Sugar | 3 tablespoons | Feeds the yeast, adds flavor |
| Active Dry Yeast | 2 1/4 teaspoons | Helps the dough rise |
| Warm Water | 1 cup | Activates the yeast |
| Olive Oil or Canola Oil | 3 tablespoons | Enhances texture and richness |
| Salt | 1 1/2 teaspoons | Flavor enhancer |
| Melted Butter (Optional) | 1/4 cup | Adds flavor and softness |
After mixing, let it sit for about 10 minutes. This lets everything blend well together. Kids love the next part: kneading the dough in the bag for 5-10 minutes. The dough rises for 25-45 minutes next, using your chosen recipe or bread making method. Finally, bake at 375 degrees Fahrenheit for 25-30 minutes until golden brown.
What’s really amazing about this method is its simplicity and the awesome bread it makes. Every step helps make a light, fluffy loaf you’ll be proud of. It’s tasty, easy, and so satisfying!
Creative Variations on the Basic Recipe
Exploring recipe variations lets me adjust bread to fit personal tastes or health needs. This includes making gluten-free bread or vegan options. By adding flavors, I can make basic bread a standout dish for any meal or special event.
I love to add unique, tasty elements into the bread, making it both appealing and delicious. For example, turning simple garlic bread into a gourmet treat. Adding minced garlic, parsley, and Parmesan cheese does the trick. It’s an easy way to boost both flavor and appearance.
Making bread for gluten-intolerant friends is crucial. I experiment with gluten-free flour blends to get the right feel. For vegans, I switch dairy for almond or soy milk and replace eggs with flaxseed. This makes any bread vegan-friendly and tasty.
- Adding Flavors: Adding things like olives, sun-dried tomatoes, or rosemary to dough makes bread extraordinary.
- Vegan and Gluten-Free Modifications: I swap out dairy and eggs for plant-based options and use gluten-free flour, tweaking hydration to perfect the dough.
Here are some creative bread types that show how far you can go:
| Savory Bread Variations | Described Benefits | Preparation Ease |
|---|---|---|
| Everything Bagel Focaccia | No special tools, one short rise | Simple |
| Garlic Bread | Quick preparation in less than 30 minutes | Very Easy |
| Pesto Star Bread | Great for dinner parties, customizable | Moderate |
| Homemade Bagels | Customizable flavors like cinnamon sugar or sesame | Fun & Engaging |
| Pumpkin Cornbread | Suitable for fall, includes spices and pumpkin puree | Seasonal & Flavorful |
Changing up bread recipes with different ingredients opens up so many possibilities. It could be a quick garlic bread for a simple dinner or a pumpkin-spiced loaf for a fall party. Bread making is a creative process that lets us explore different tastes.
Presentation and Serving Suggestions
I always think about mixing tradition and innovation when presenting bread. It’s fun to explore decorative breads and clever ways to serve them. By doing so, every meal can become a memorable event.
Decorative ideas for your loaves start with creative scoring, like making snowflakes in winter or flowers in spring. These designs make your bread look amazing and improve its texture. Try flavors like cranberry orange walnut or jalapeno cheddar to make it a feast for the senses.
For serving suggestions, think about using items that look great but are also practical. Picture serving a warm sourdough on a slate platter. You can write suggestions on it with chalk, making it interactive and fun!
Here’s a table with popular serving items used in restaurants. You can use these to make your bread presentation at home even better:
| Accessory | Description | Usage |
|---|---|---|
| Willow Baskets | Nostalgic, traditional look | Perfect for farmhouse-style dining, serving whole bread loaves |
| Wire Baskets | Simple, elegant design | Ideal for serving bread rolls and baguettes |
| Serving Boards | Modern, minimalistic appeal | Great for sliced bread, allows for easy sharing |
| Slate Platters | Versatile, writable surface | Useful for writing serving suggestions, pairing well with cheese and deli meats |
| Pails and Cone Baskets | Contemporary, chic look | Suitable for casual settings, perfect for breadsticks and small rolls |
| Three-cone Serving Baskets | Efficient, multi-purpose | Excellent for serving a variety of appetizers alongside bread |
Every bread you bake can be the star of your table. You might use willow baskets for a classic look or serving boards for a modern vibe. How you present and serve bread can make everyday meals special!
Maintaining Freshness: Storage Tips for Homemade Bread
When you master storing preserving homemade bread, it stays fresh longer. Freshly baked bread is hard to resist. To keep it fresh, you need the right techniques. This is true especially for homemade varieties. The type of bread and how you store it matters a lot.
Storing bread right is key. Don’t put it in the fridge because it gets stale faster due to starch changes. Try a bread box or a linen bag instead. This way, your bread can stay fresh at room temp for up to six days. But, soft breads like rolls might only last 1-2 days before they dry out.
- For longer storage, freezing works great. Wrapped tight in plastic and foil, bread stays fresh in the freezer for up to 6 months. If you use it daily, slice it and keep it in a Ziploc bag. Arrange the slices well to reduce air exposure.
- Reheating frozen bread can make it taste freshly baked again. Using a toaster with a frozen setting, like the Breville Smart Toaster, does the trick.
Another key factor is the moisture in your storage spot. In dry places, keep bread cut-side down to save moisture. But, in humid areas, seal your bread well to stop mold. Storing bread right means it stays tasty and fresh.
| Bread Type | Recommended Storage | Typical Freshness Duration |
|---|---|---|
| Sourdough | Room Temperature (Linen Bag Preferred) | Up to 1 week |
| Soft Rolls/Sandwich Bread | Freezer (For Longer Storage) | 1-2 days at room temperature |
| Quickbreads (High moisture) | Keep in a cool, dry place; consume quickly | Speedy molding due to moisture |
Enjoying bread when it’s fresh is best. Preserving homemade bread well makes your baking worth it. Every slice stays delicious. For more tips on tasty homemade recipes, explore and bake. Happy baking and enjoy fresh, yummy bread every day!
Looking back at making bread in a bag, I’m struck by the happiness and knowledge gained from making just one loaf. We started with basic ingredients: 2 cups of regular flour, 2 cups of whole wheat, a bit of sugar, and yeast. Mixing these, I saw the dough grow 1.5 times and bake into golden goodness in 30-35 minutes at 350 degrees Fahrenheit. This journey taught me not just how to bake bread, but also the value of the lessons and memories created.
In this process, I learned how important it is to measure ingredients correctly. Getting the dough stiff and the water mix right was key. The mix of flours made the bread just right for everyone. Letting the dough rise perfectly with quick-rise yeast was essential. This needed teamwork, which made sure everyone participated in the baking.
The bread we made was pure and unspoiled. We learned cleanliness is crucial, as our experiment showed. Washing hands with soap kept the bread fresh longer, proving teamwork and cleanliness matter. Making posters about germs added to our learning. This wasn’t just fun; it was a lesson in cooking and teamwork that ended up being so rewarding.
FAQ
What makes Bread in a Bag a great project for beginner bakers?
Bread in a Bag is very simple and clean, perfect for those new to baking. It teaches bread-making basics in a fun, mess-free way.
How can making Bread in a Bag be a fun family activity?
It’s a great project for the whole family. Everyone from kids to adults can help measure and knead the dough. It’s a fun, hands-on way to spend time together and learn to cook.
What are the most important ingredients for making Bread in a Bag?
Good all-purpose flour and the right yeast are key. Flour builds the bread’s base, and yeast makes it rise and get fluffy.
How do I prepare my workspace for making Bread in a Bag with kids?
Make sure your space is tidy with everything you need close by. Use lower tables for kids and safe tools for them to use.
What’s the proper way to mix and knead the dough for Bread in a Bag?
First, mix dry ingredients in the bag, then add wet ones. Seal the bag and use your hands to mix and knead. This keeps everything clean.
Why is the rising time important when making Bread in a Bag?
Rising lets yeast work, making the dough expand and get soft and fluffy. It’s crucial for the bread’s texture and flavor.
What tips do you have for shaping the perfect loaf of bread?
Fold the dough carefully to form your loaf and fit it in the pan. Smooth the ends for a nicer look.
Can I make adjustments to the Bread in a Bag recipe if I live in a particularly humid or dry climate?
Yes, adjust flour or liquid as needed. Add more liquid in dry places, more flour in humid ones for the right dough feel.
Are there ways to customize the basic Bread in a Bag recipe to fit dietary restrictions?
You can use gluten-free flour or dairy-free milk and butter. Choose yeast that matches your diet too.
How should I store my homemade Bread in a Bag to keep it fresh?
Cool it, then store in a bread bag or box. Avoid plastic bags; they can make crust soggy. Freeze slices for longer keeping.